

Overview
Switching from another budgeting app? Treasury can import your transactions and history so you don’t start from scratch. Open the importer from Settings → Data Import, or from the Import data prompt on your home dashboard.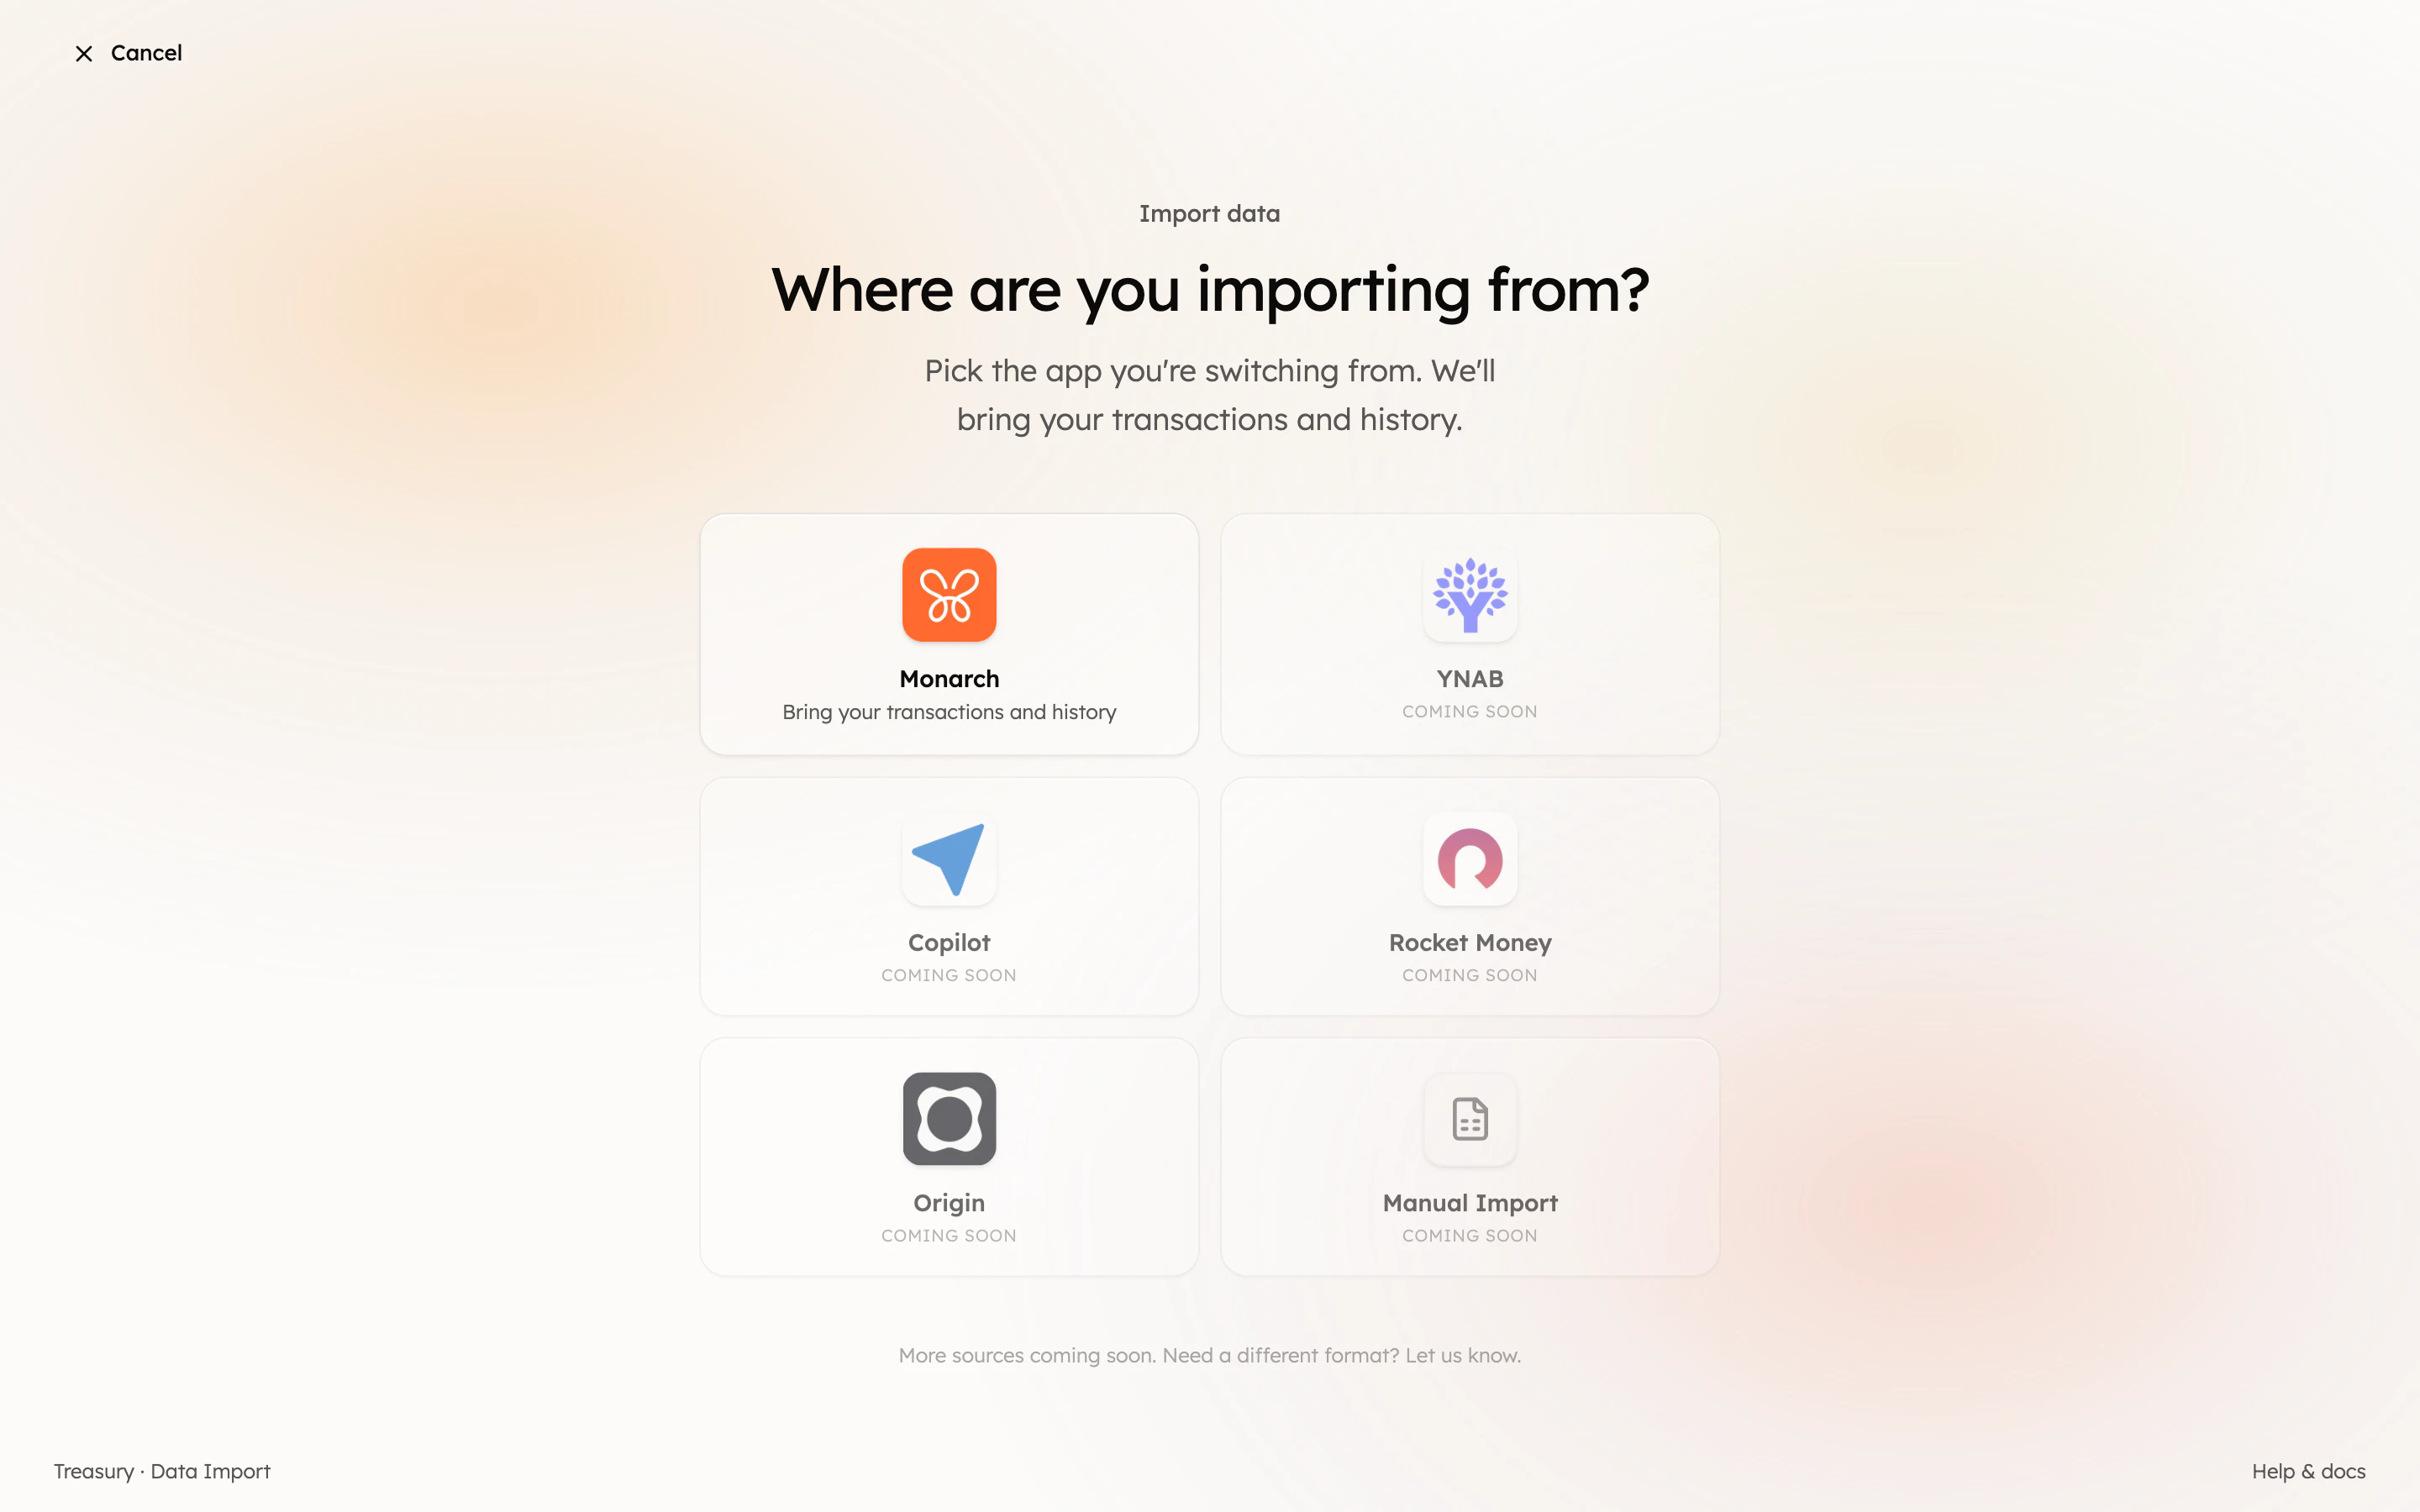
What you can do here
- Import transactions, accounts, and balance history from another app.
- Merge imported history into accounts you connect — one continuous timeline.
- Map your old accounts and categories to Treasury’s.
- Review everything before it’s imported, then confirm.
Choose where you’re importing from
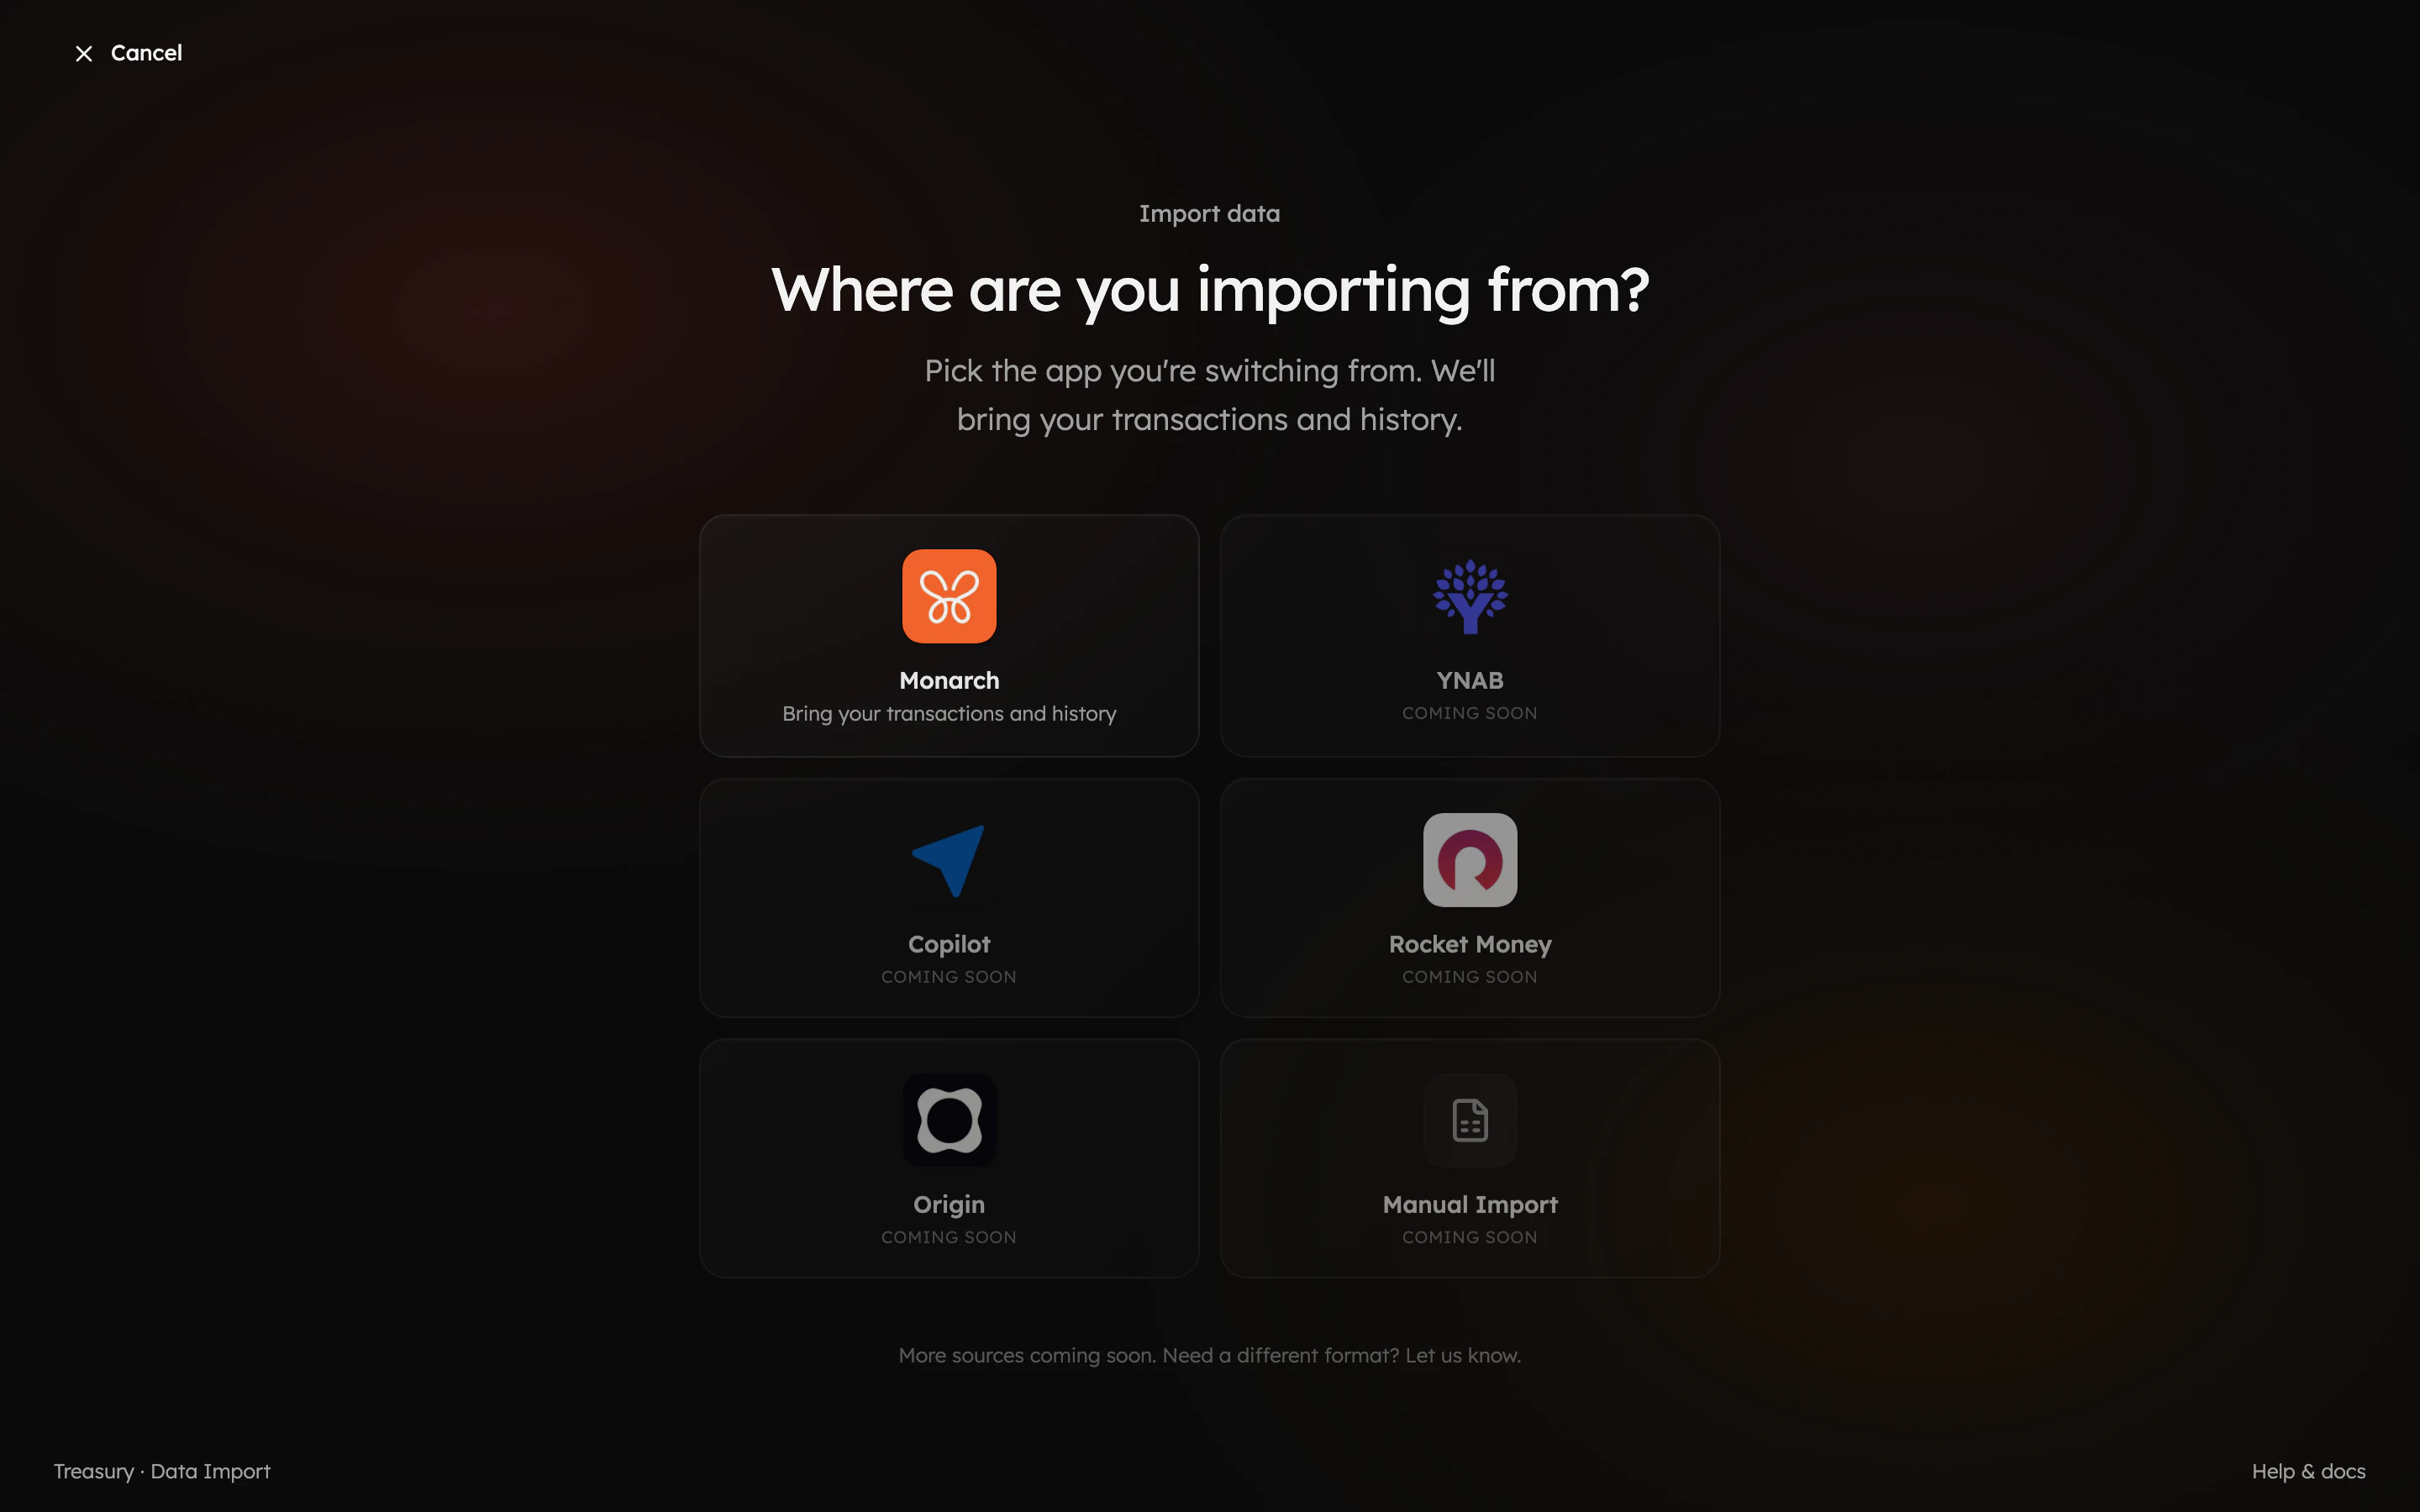
The importer starts by asking “Where are you importing from?” Pick the app you’re switching from. Treasury supports three sources today:- Monarch — upload your transactions and balance-history exports.
- Apple Card — upload the CSV you export from Wallet on your iPhone or iPad.
- CSV Import — bring transactions in from any app using Treasury’s template.
Monarch links your accounts in a connect step first. Apple Card and CSV Import come
straight from a file, so they skip connecting and take you right to the upload step.
Walk through the import
Once you pick a source, Treasury guides you through a short series of steps — connect your accounts, upload your export, map your accounts and categories, review, and import.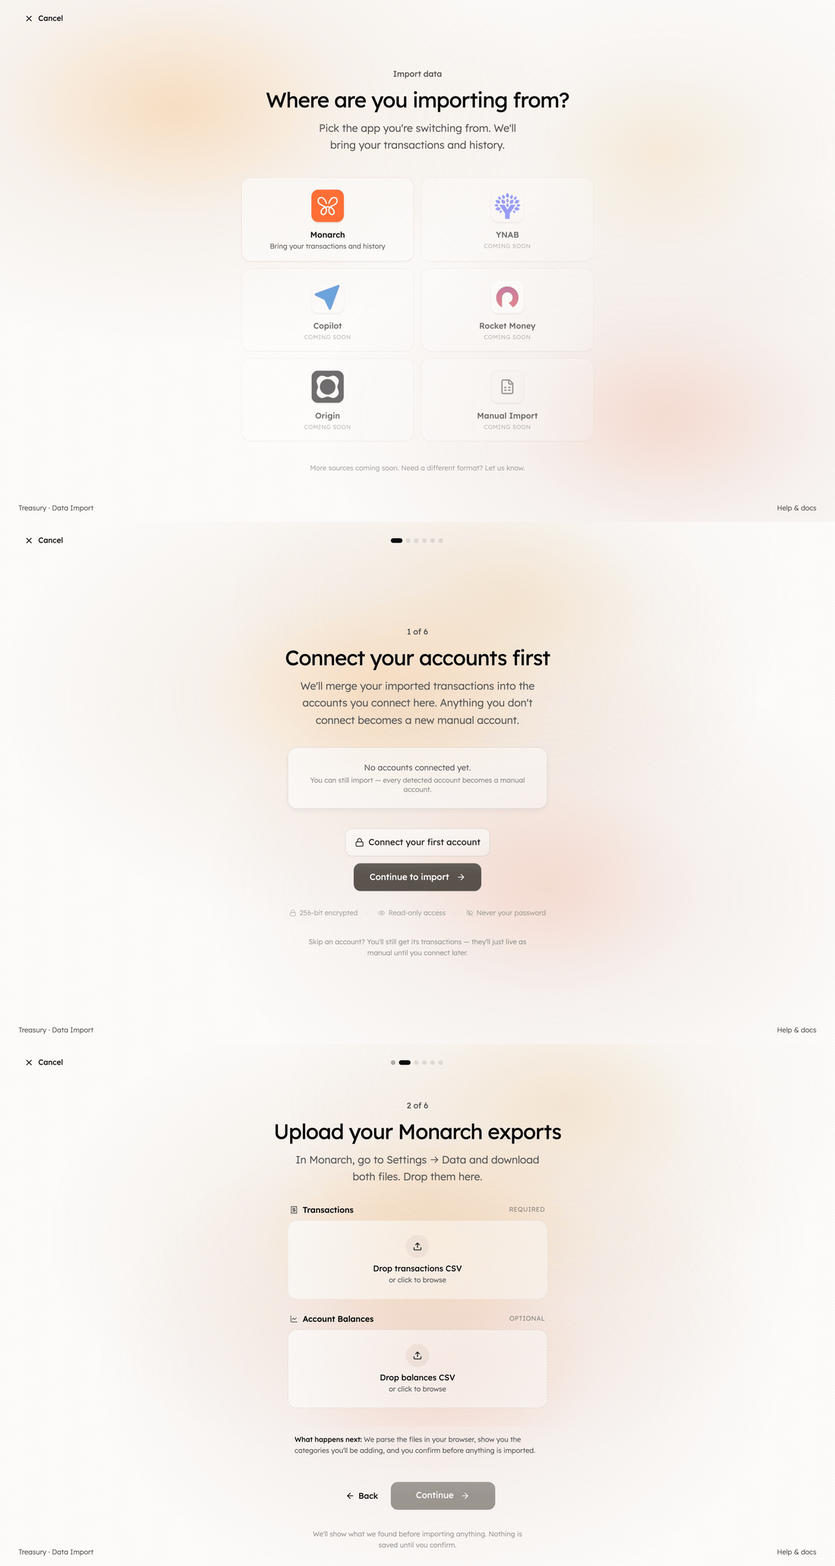
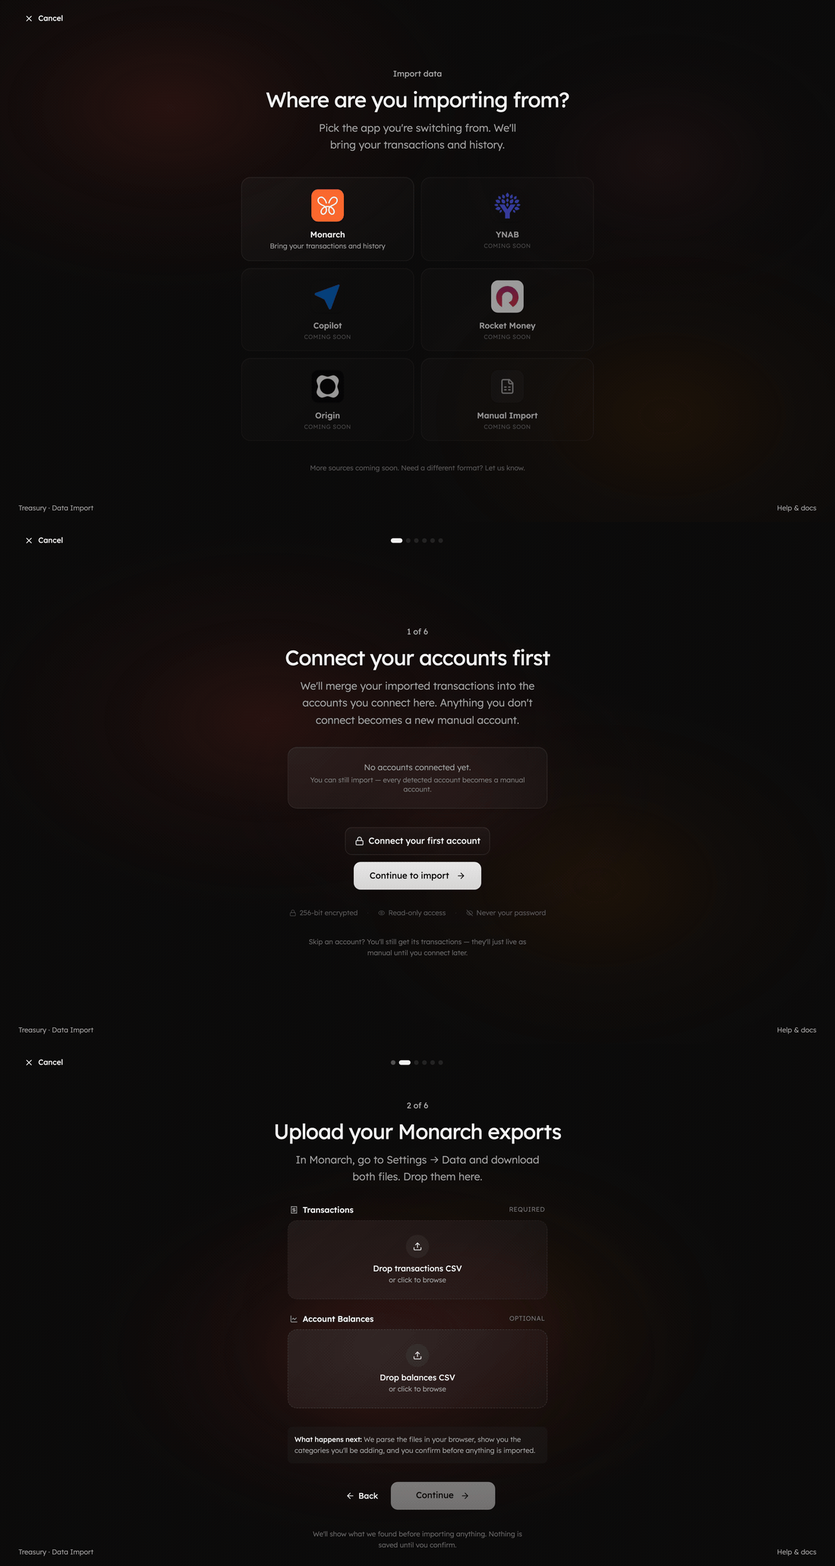
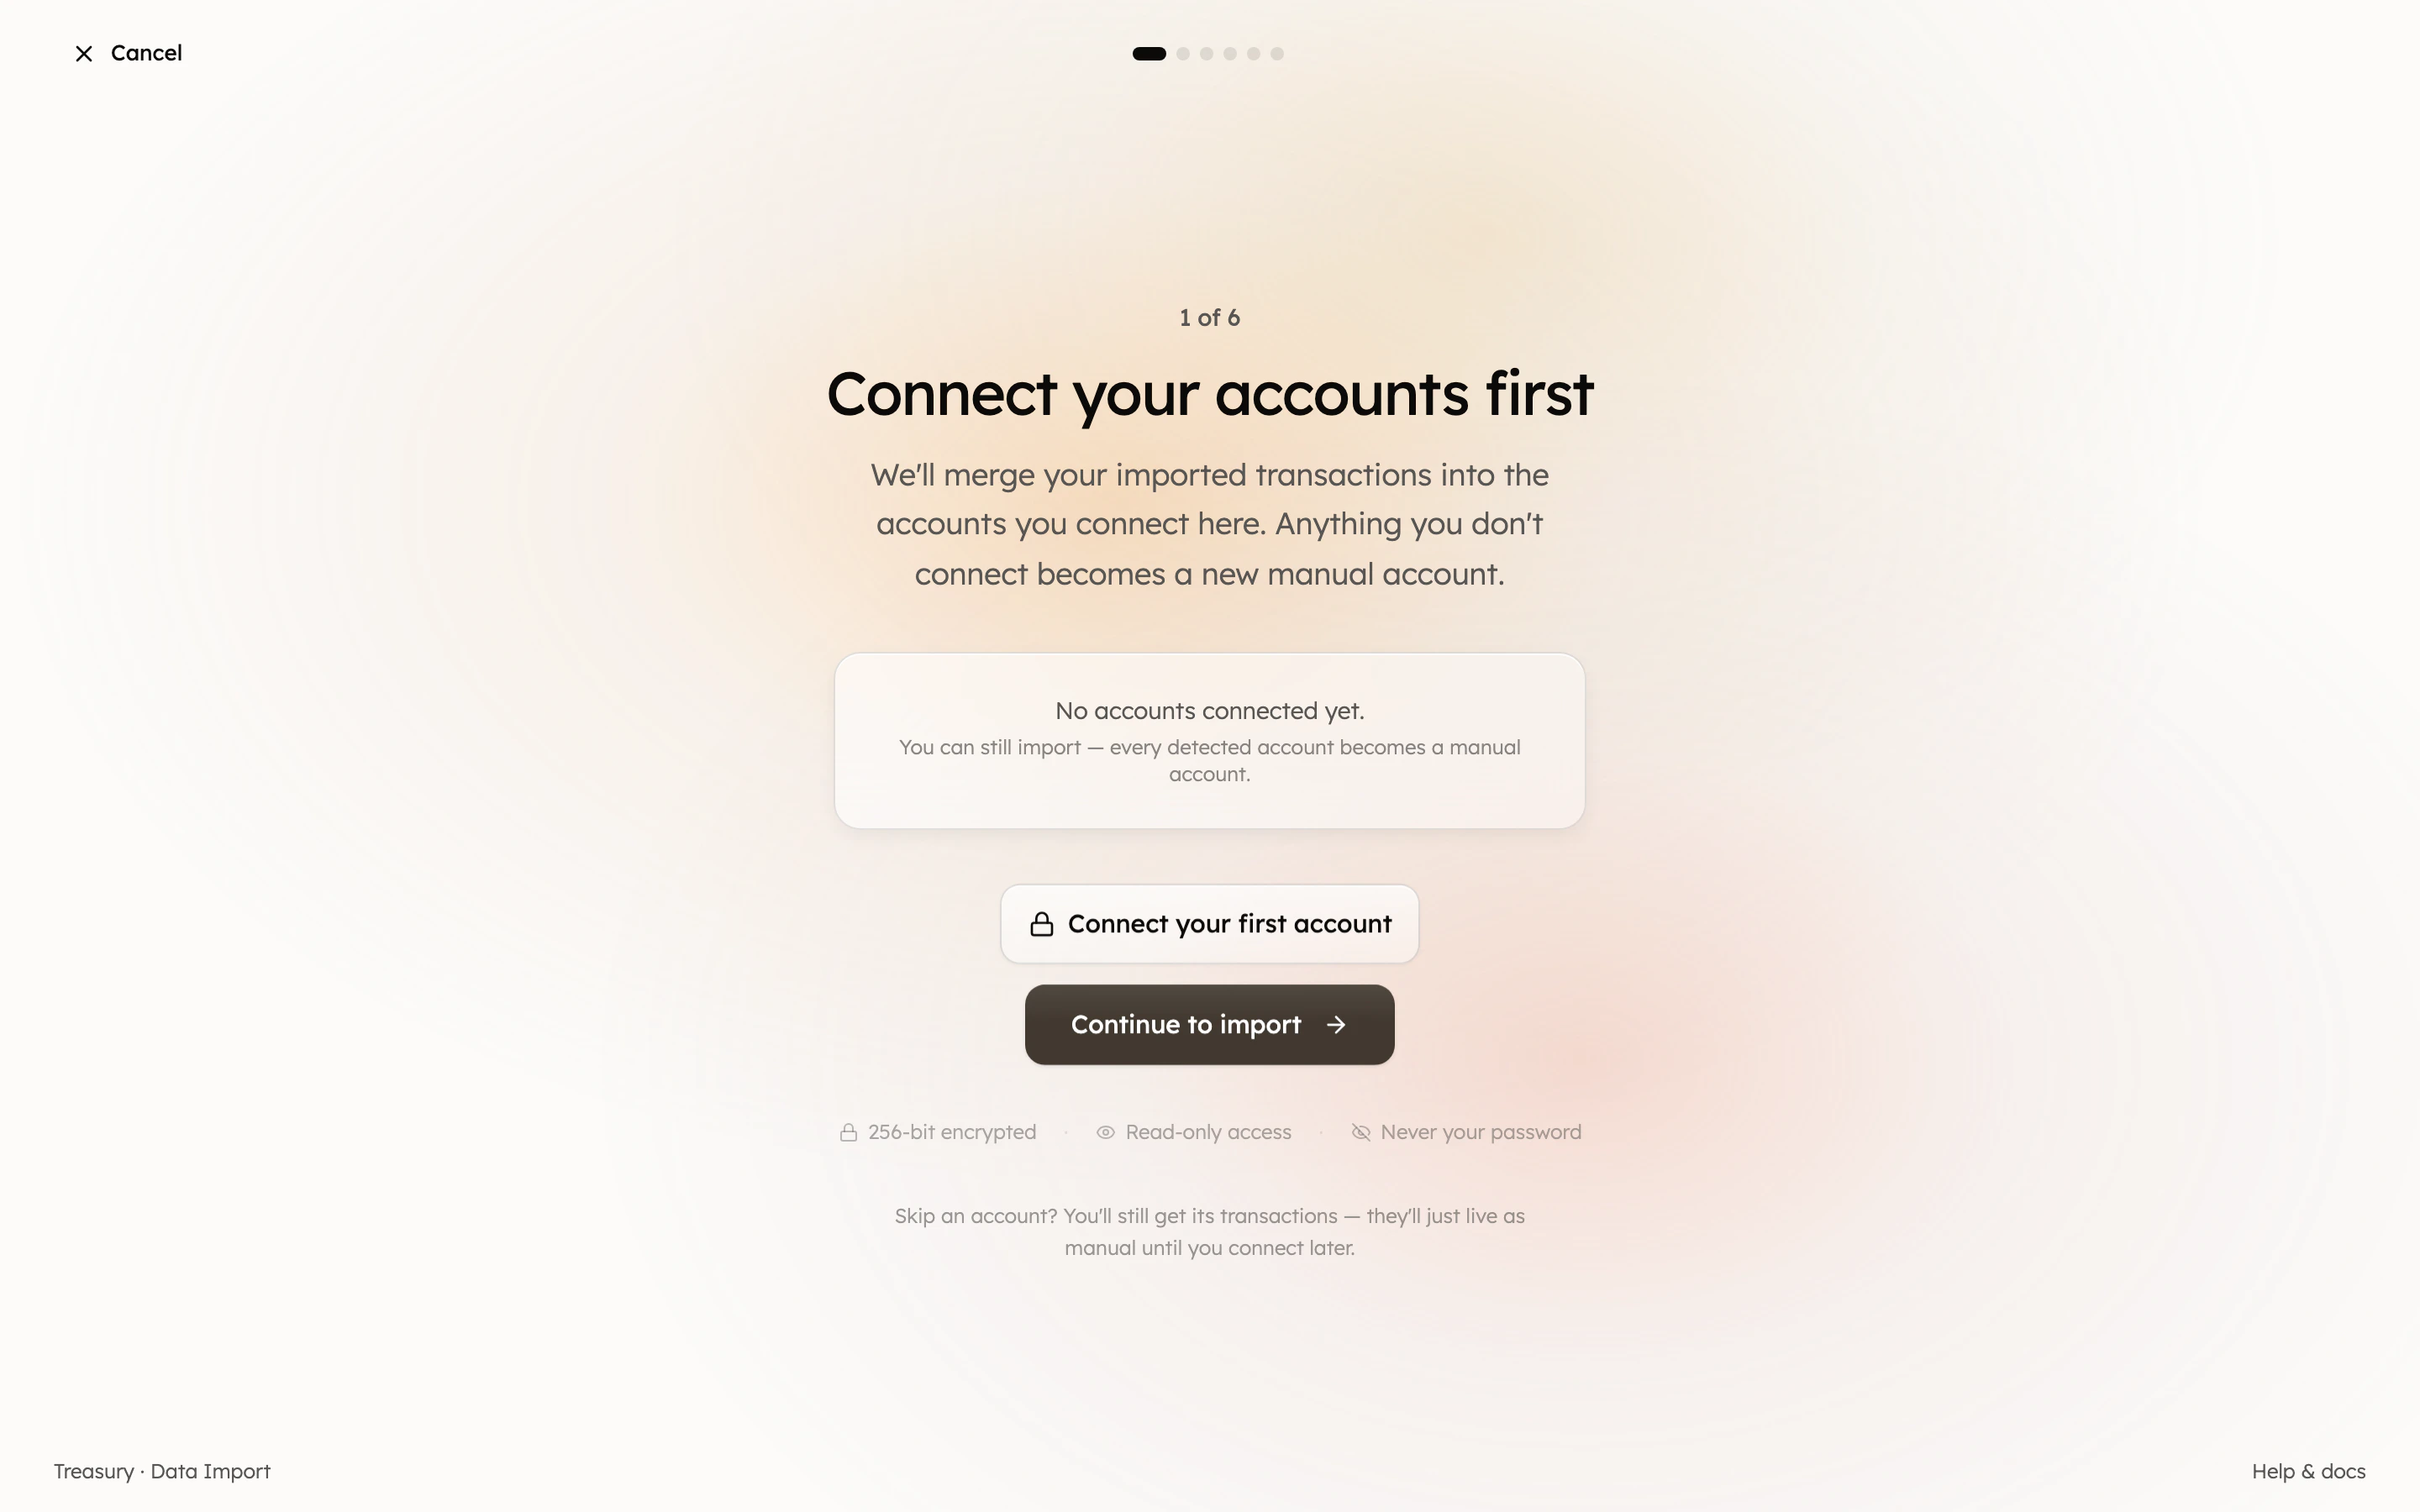
1. Connect your accounts first
This step applies to Monarch. Apple Card and CSV Import skip straight to upload — see
Importing from a CSV file below.
2. Upload your export
Upload the file you exported from your previous app. Treasury reads your transactions, accounts, and historical balances from it.3. Map accounts and categories
Match the accounts and categories from your export to the ones in Treasury (or let Treasury create new ones). This keeps your history consistent — your old “Groceries” lands in the right Treasury category, and each imported account maps to the right place.4. Review and import
Confirm what’s about to be imported, then let Treasury bring it all in. When it finishes, you’ll see a summary of everything that was added, and your transactions, accounts, and net-worth history will be ready to use.Importing from a CSV file
Two sources — Apple Card and CSV Import — bring data in from a CSV file rather than a linked bank. They skip the connect step and go straight to upload.Apple Card
Apple Card isn’t available through bank connections, so Treasury imports it from the CSV you export on your device:- On your iPhone, open Wallet and tap Apple Card (on iPad: Settings → Wallet & Apple Pay → Apple Card).
- Tap Card Balance.
- Under Statements, tap Export Transactions.
- Choose a start and end date, pick CSV as the file format, then tap Done.
CSV Import (any app)
If your app isn’t listed, choose CSV Import to bring transactions in from a file that follows Treasury’s template. On the upload step, download the Transactions template (and the optional Balances template), fill it in, then upload it. Your CSV must follow this schema:
Column order doesn’t matter and optional columns can be left out — Treasury matches columns by name.
FAQ
Which apps can I import from?
Which apps can I import from?
Monarch, Apple Card, and any app via CSV Import (using our template) are supported
today. YNAB, Copilot, Rocket Money, and Origin are on the way.
Can I import my Apple Card?
Can I import my Apple Card?
Yes. Apple Card isn’t available through bank connections, so you import it from the CSV you
export in Wallet → Apple Card → Card Balance → Export Transactions. See Apple
Card above for the full steps.
My app isn't in the list — can I still import?
My app isn't in the list — can I still import?
Yes — choose CSV Import and download Treasury’s template. As long as your file has a
Date and an Amount column, Treasury can read it. See CSV Import
for the full schema.
Which way should amounts be signed in the CSV template?
Which way should amounts be signed in the CSV template?
Money you spent is a positive number; money you received (income, refunds) is
negative. For the optional balances file, assets are positive and what you owe is negative.
Will I get duplicate transactions?
Will I get duplicate transactions?
No. For connected sources, Treasury merges imported history into the account you connect. For
CSV and Apple Card imports, re-importing an overlapping date range skips rows it already has
(matched on account, amount, and merchant), so you won’t get duplicates.
What if I don't connect the matching bank?
What if I don't connect the matching bank?
Anything you don’t connect is imported into a new manual account, so you keep all the
history. You can connect the live account later.
What happens to my categories?
What happens to my categories?
You map your old categories to Treasury’s during the import (or let Treasury create them). Tidy
up any leftovers afterward in Categories.
Related
Connections
Link the accounts your history should merge into.
Manual Accounts
Unconnected accounts import as manual accounts.
Transactions
Where your imported activity lands.
Net Worth
Imported balances and history feed your net worth.