Overview
Your budgets are found on the navigation bar. This is where you can create, view, and manage the budgets you use to plan and track your income, expenses, and savings over time.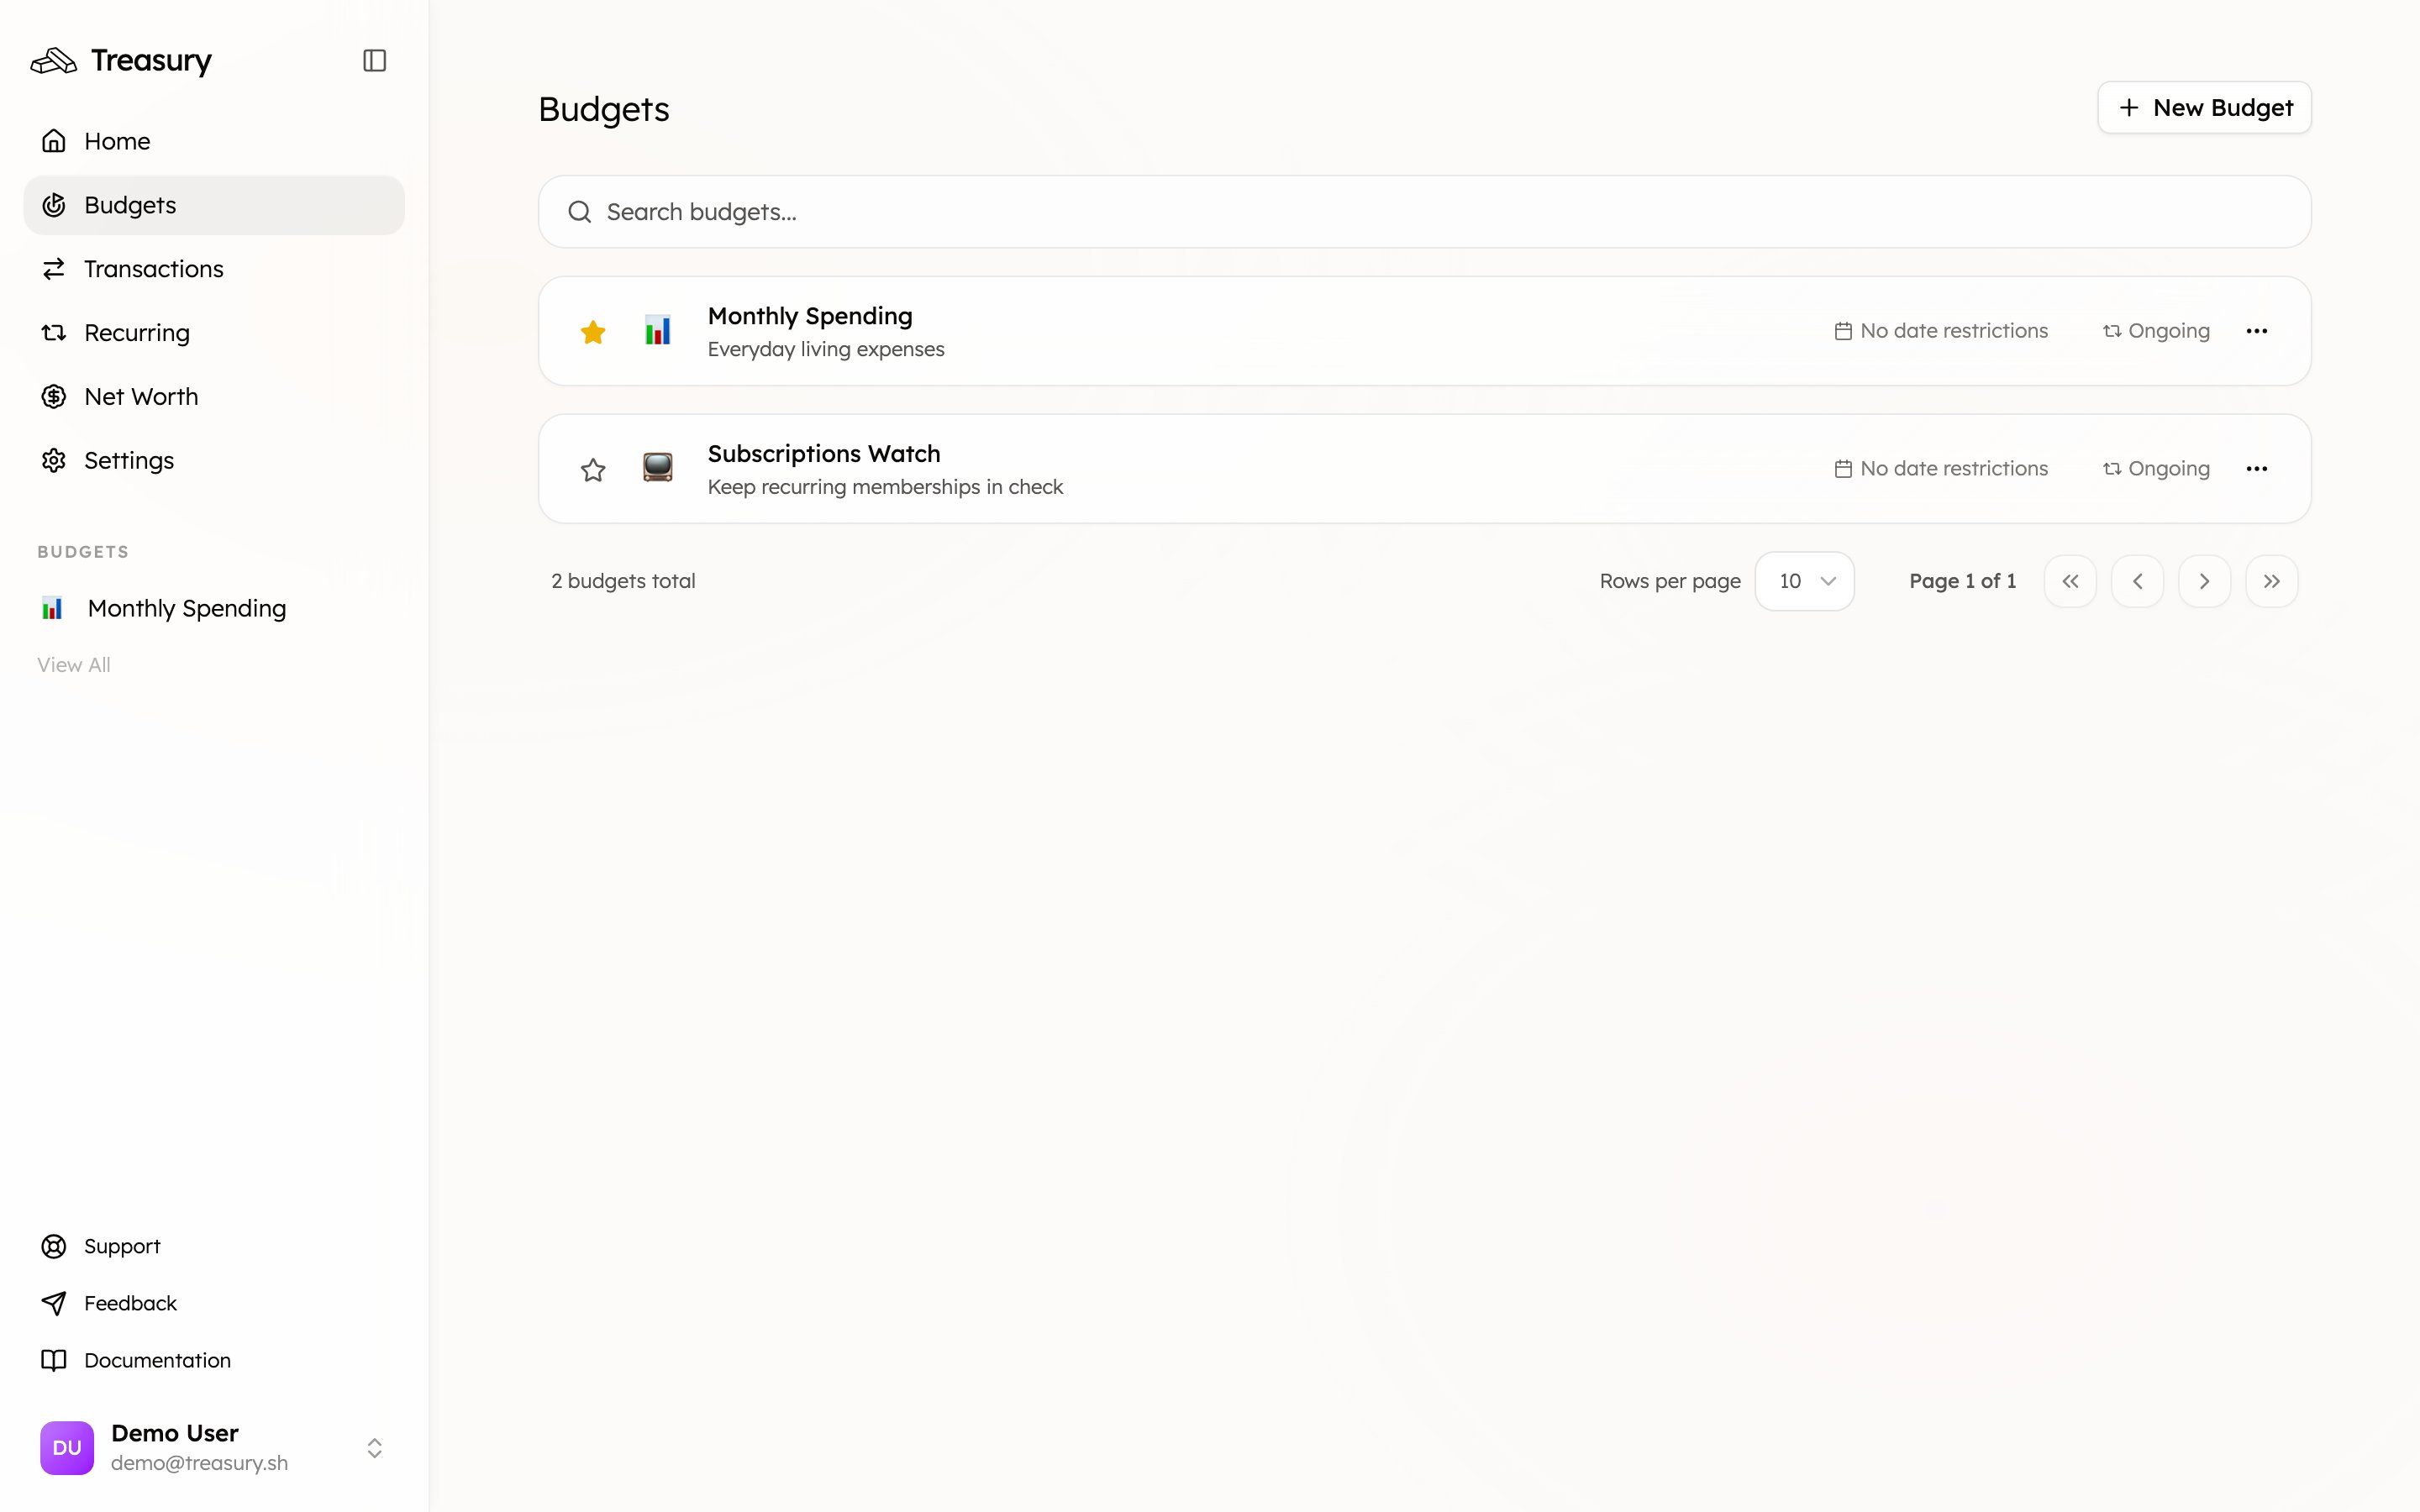

What you can do here
- Create ongoing budgets (recurring spending) or goal budgets (one-off targets).
- Allocate amounts per category and track budgeted vs. actual.
- See income, expenses, and savings netted into your cash flow.
- Pin the budget you check most to your sidebar and dashboard.
- Step through previous months to compare performance.
What are budgets?
Budgets in Treasury help you plan, track, and visualize your spending and savings over time. They show how your money flows in and out — giving you a clear picture of your income, expenses, and savings across selected categories. Each budget displays your total performance at a glance:- Income shows how much money you’ve earned.
- Expenses track how much you’ve spent.
- Savings capture how much you’ve set aside or transferred toward goals.
Budgets are built from your categories, so you’ll need at least one category before you can create a budget. If you haven’t set any up yet, Treasury will point you to Categories first.
Create a Budget
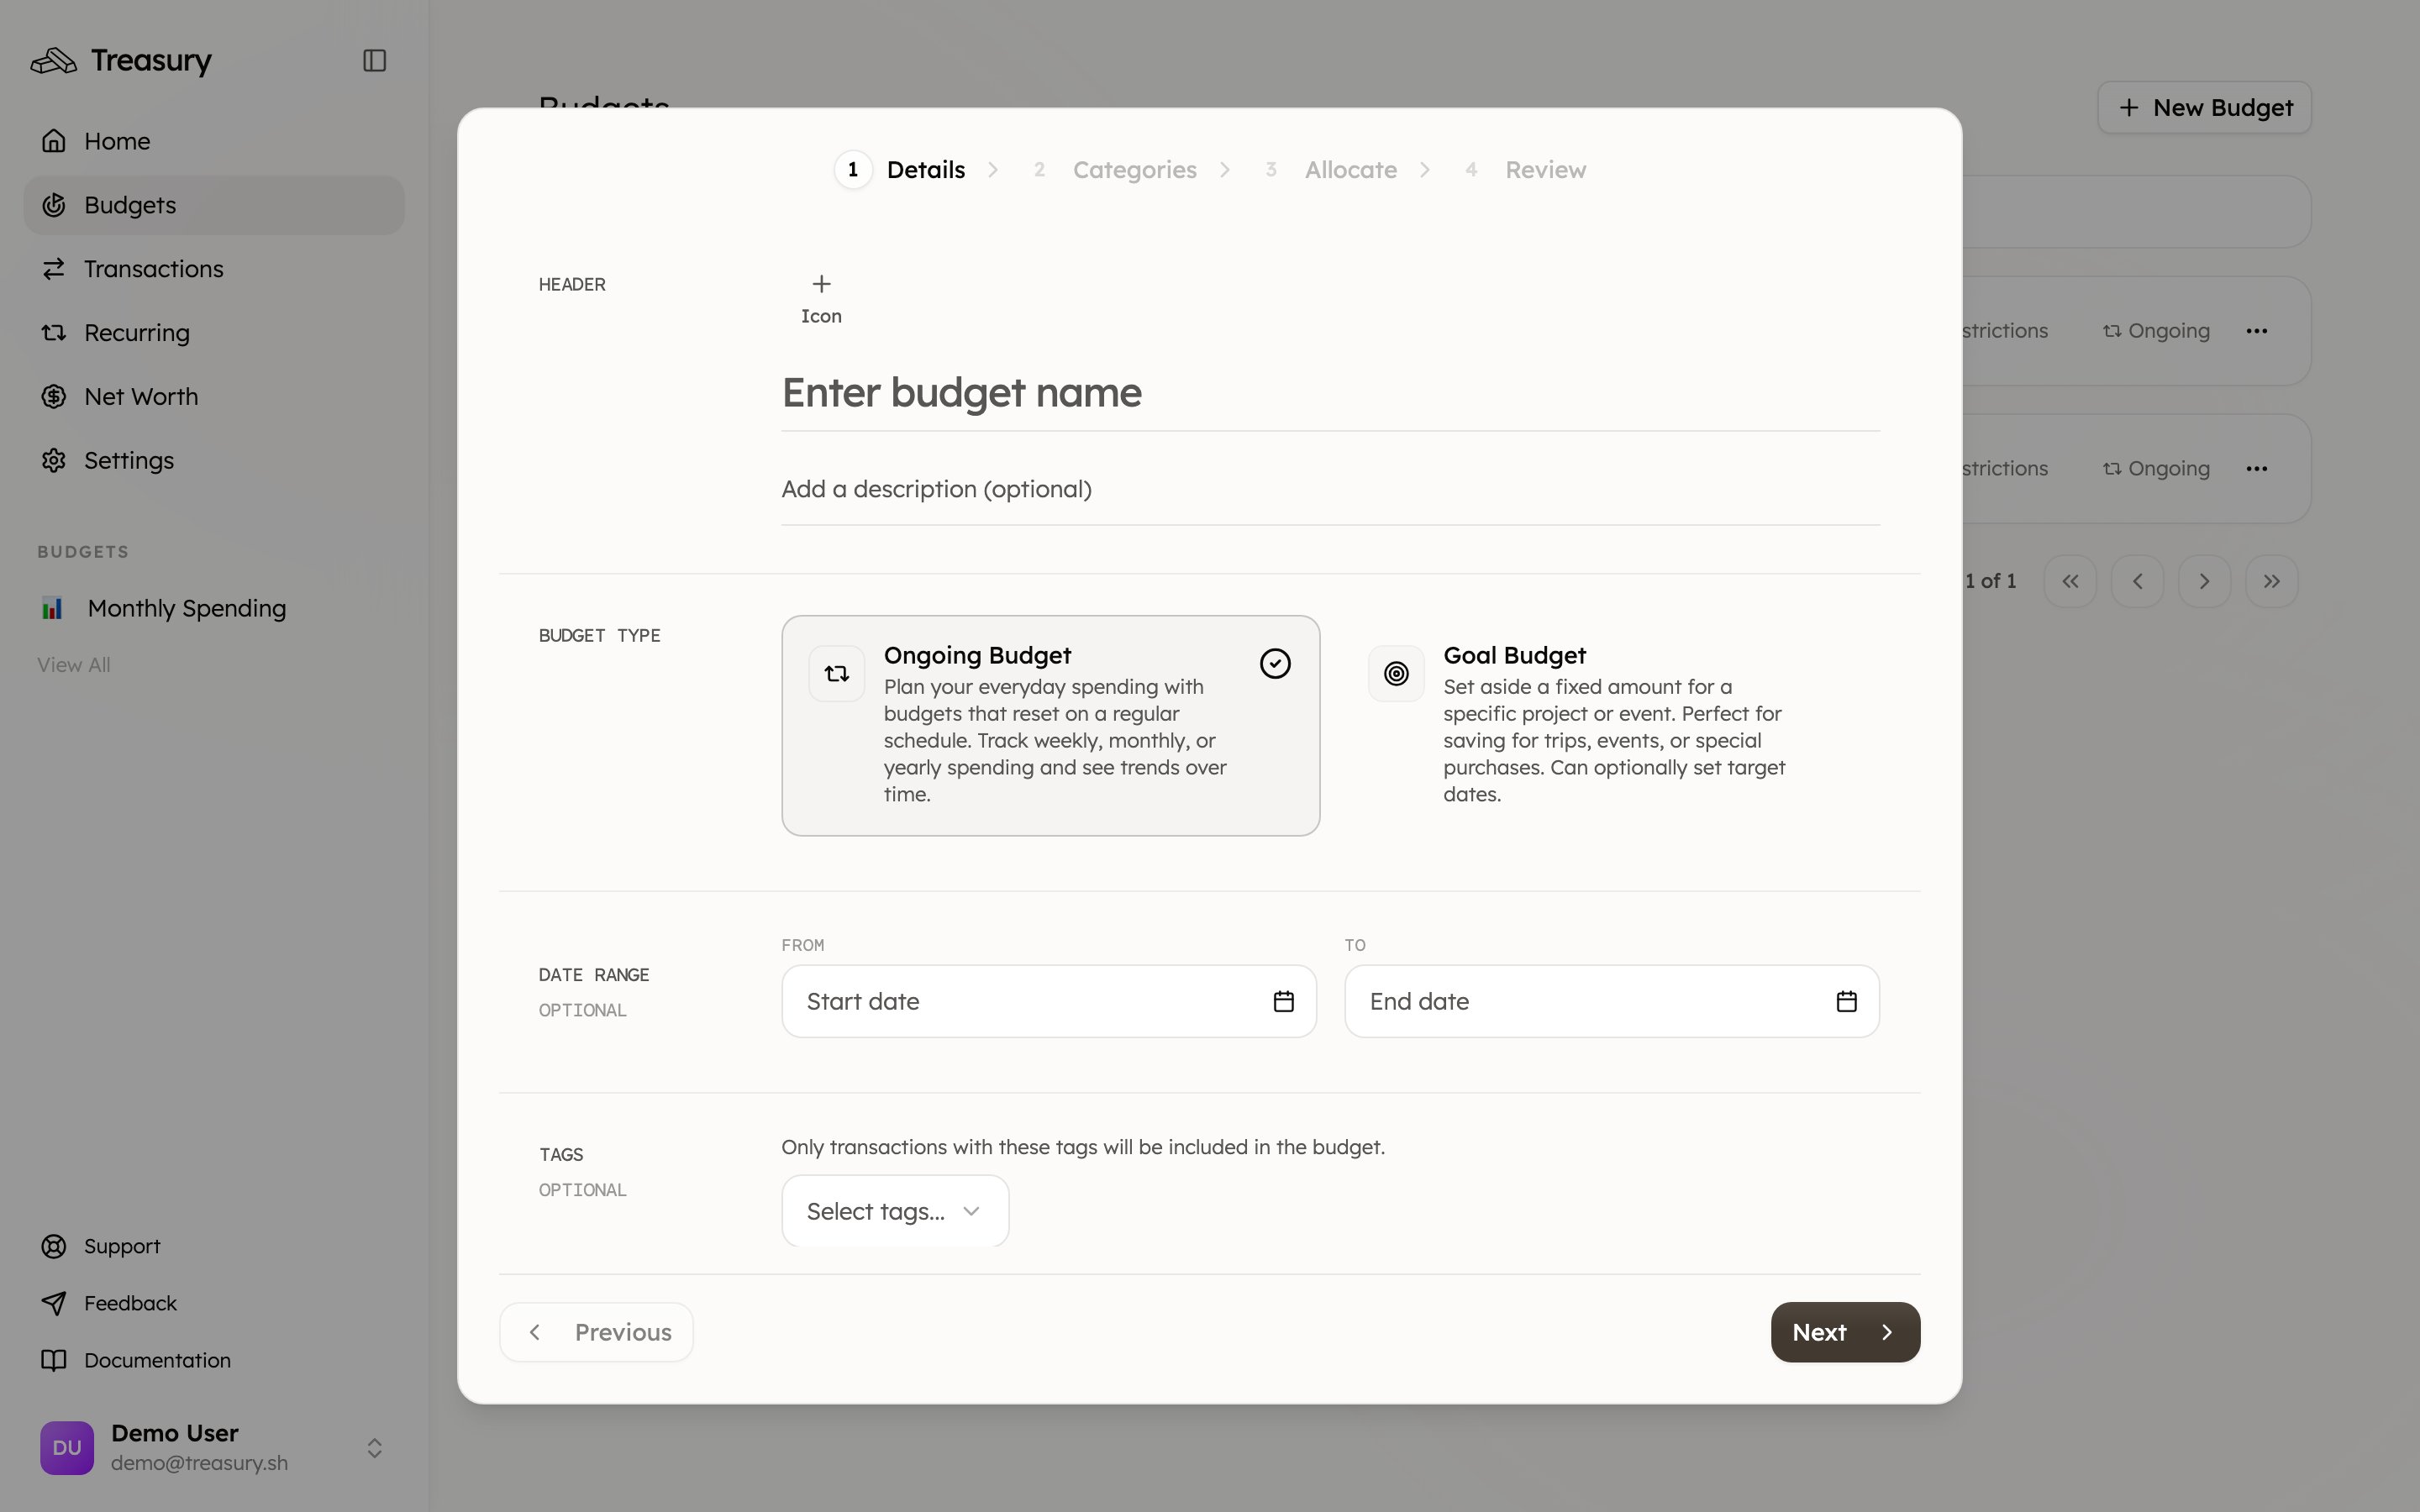
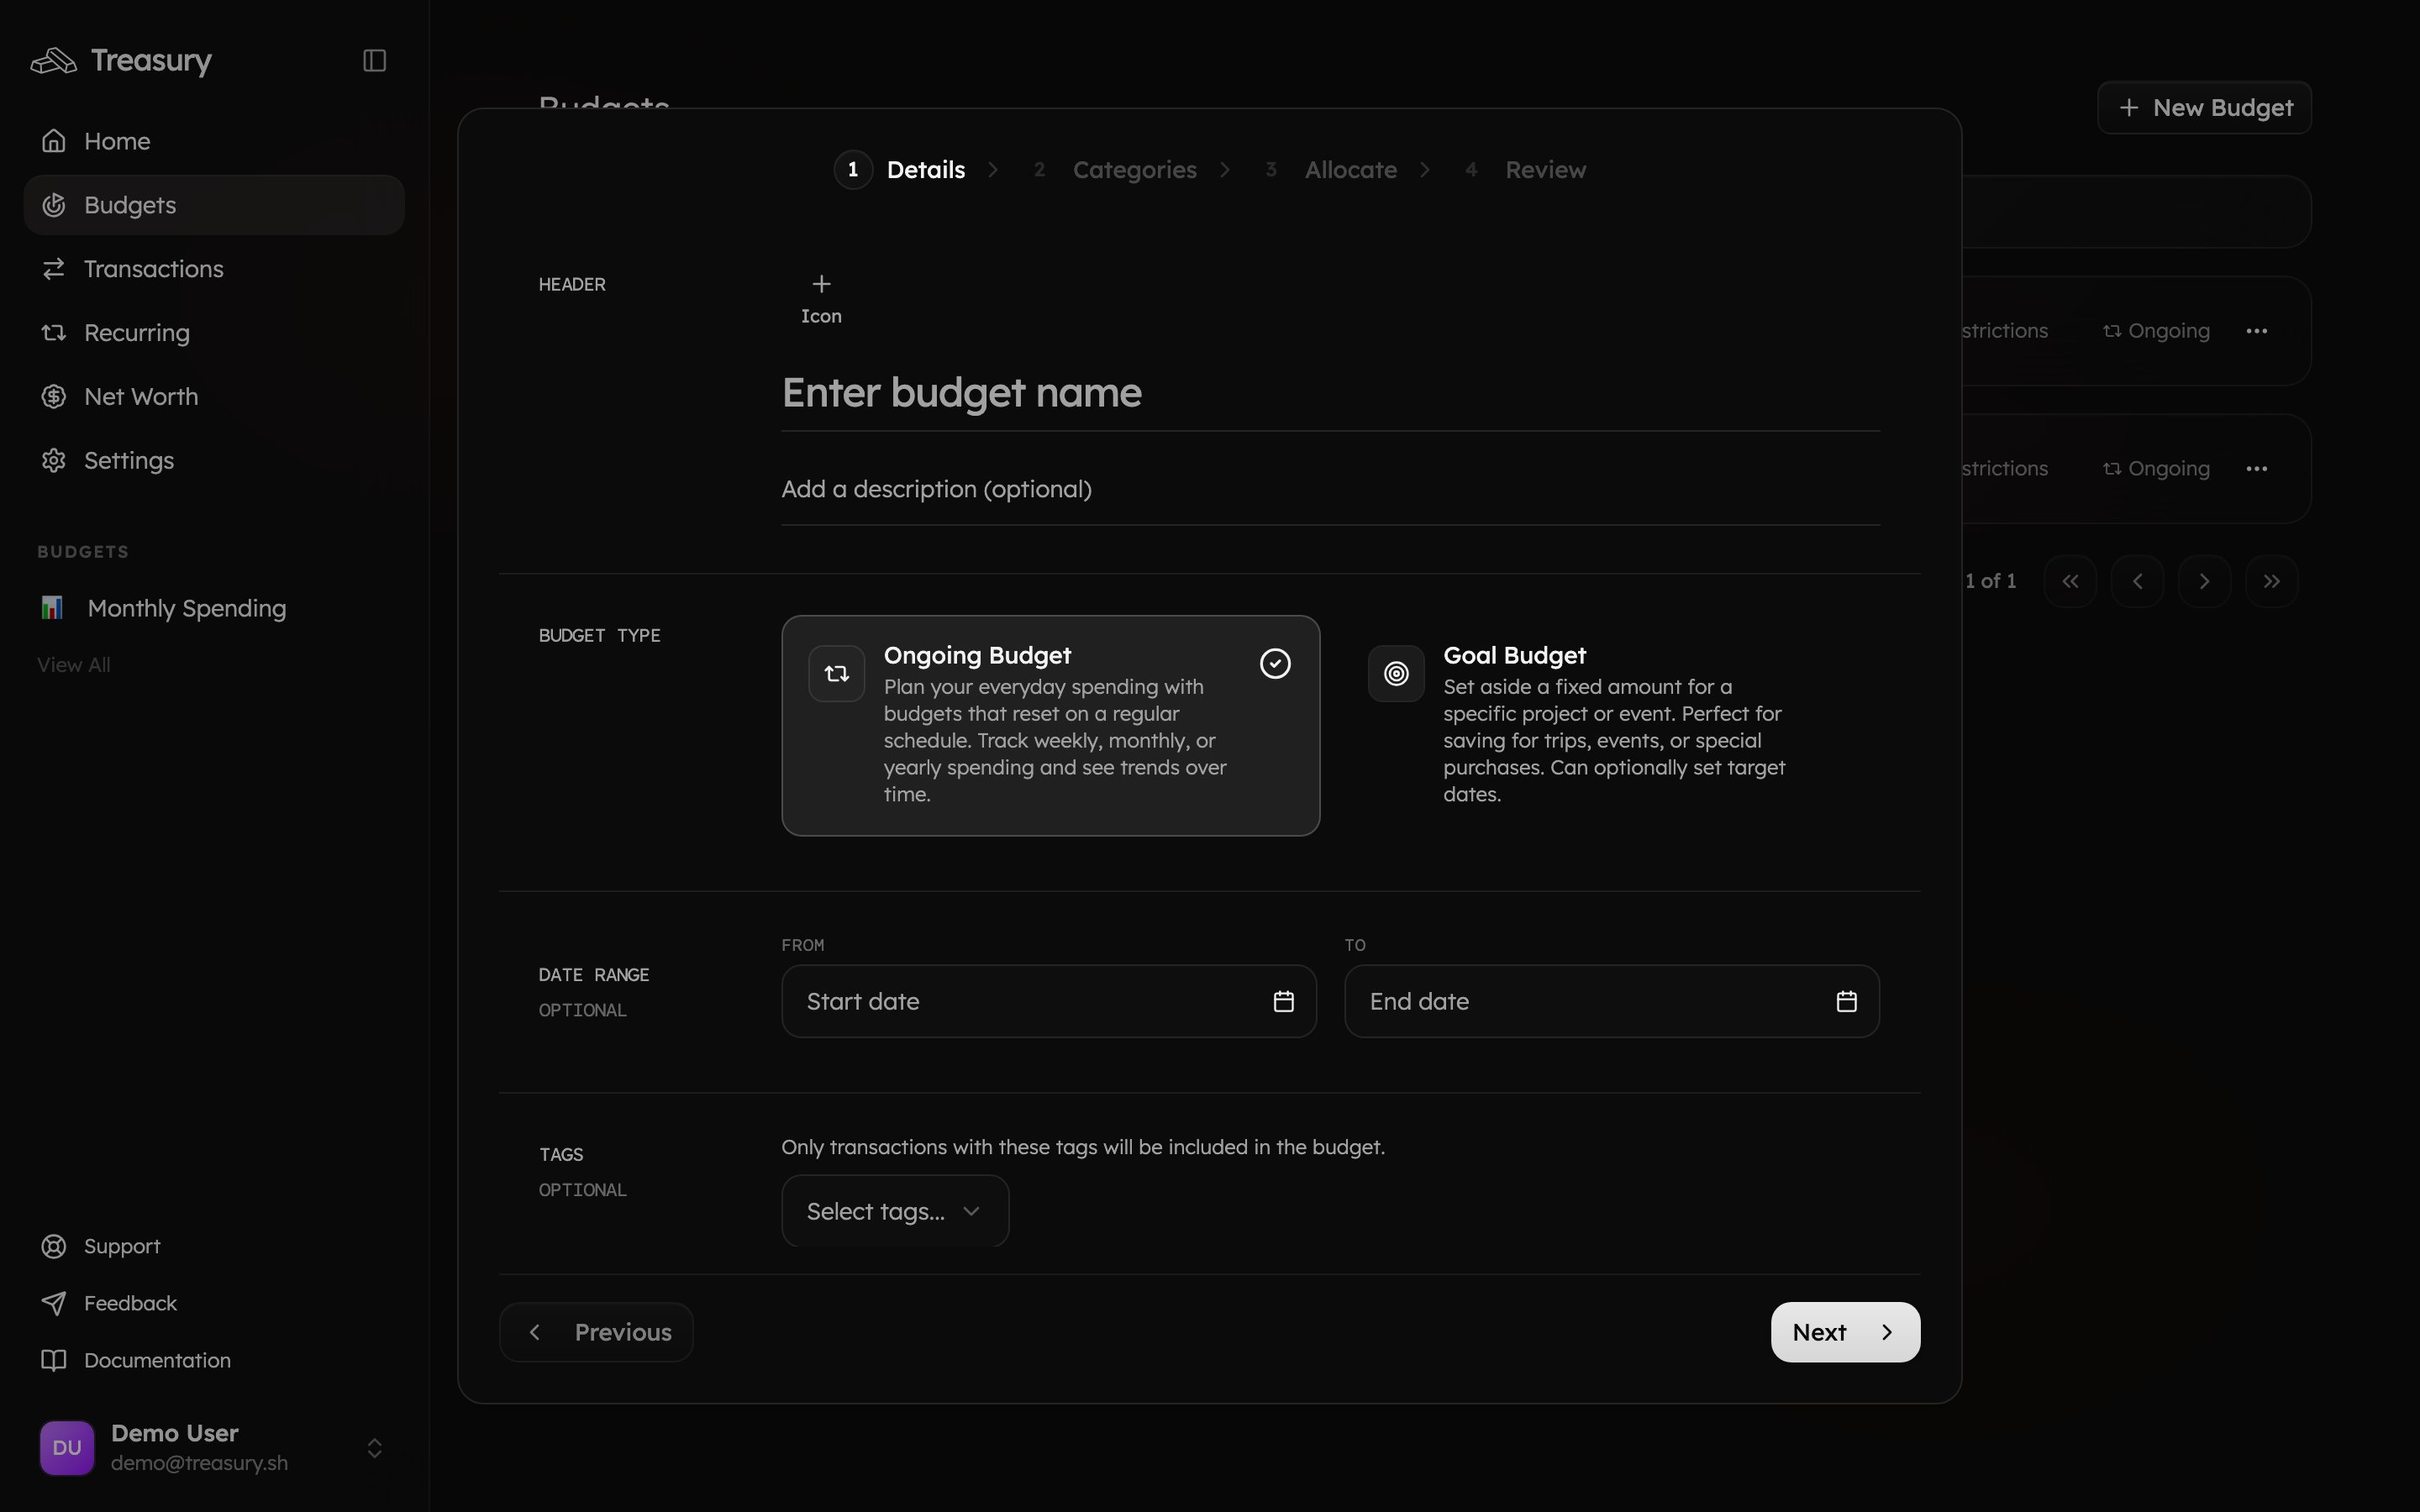
To create a new budget, go to Budgets → New Budget. You’ll be guided through four steps: Details, Categories, Allocate, and Review.Step 1: Details
Enter the name of your budget, choose an icon, and optionally add a description to clarify its purpose (for example, “Day to Day” or “Lapland 2025 Trip”). Next, select your currency and budget type:- Ongoing Budget — great for tracking regular spending that resets on a schedule (e.g., monthly or yearly).
- Goal Budget — ideal for specific savings goals or one-time projects (e.g., vacations, events, or large purchases).
Step 2: Categories
Next, you can select which categories you want to include in your budget. Click a category to add it to one of the boxes at the top (Income, Expense, or Saving). You can also click Create Group to organize multiple categories of the same type together — for example, grouping Food, Rent, and Healthcare under “Monthly Expenses.” When your categories are set, click Next.Step 3: Allocate
Decide how much you want to allocate to each category. You can set daily, monthly, or yearly amounts depending on your tracking preference. The table will automatically calculate the net total, showing the difference between income and expenses (including savings). Click Next once you’ve finished allocating.Step 4: Review
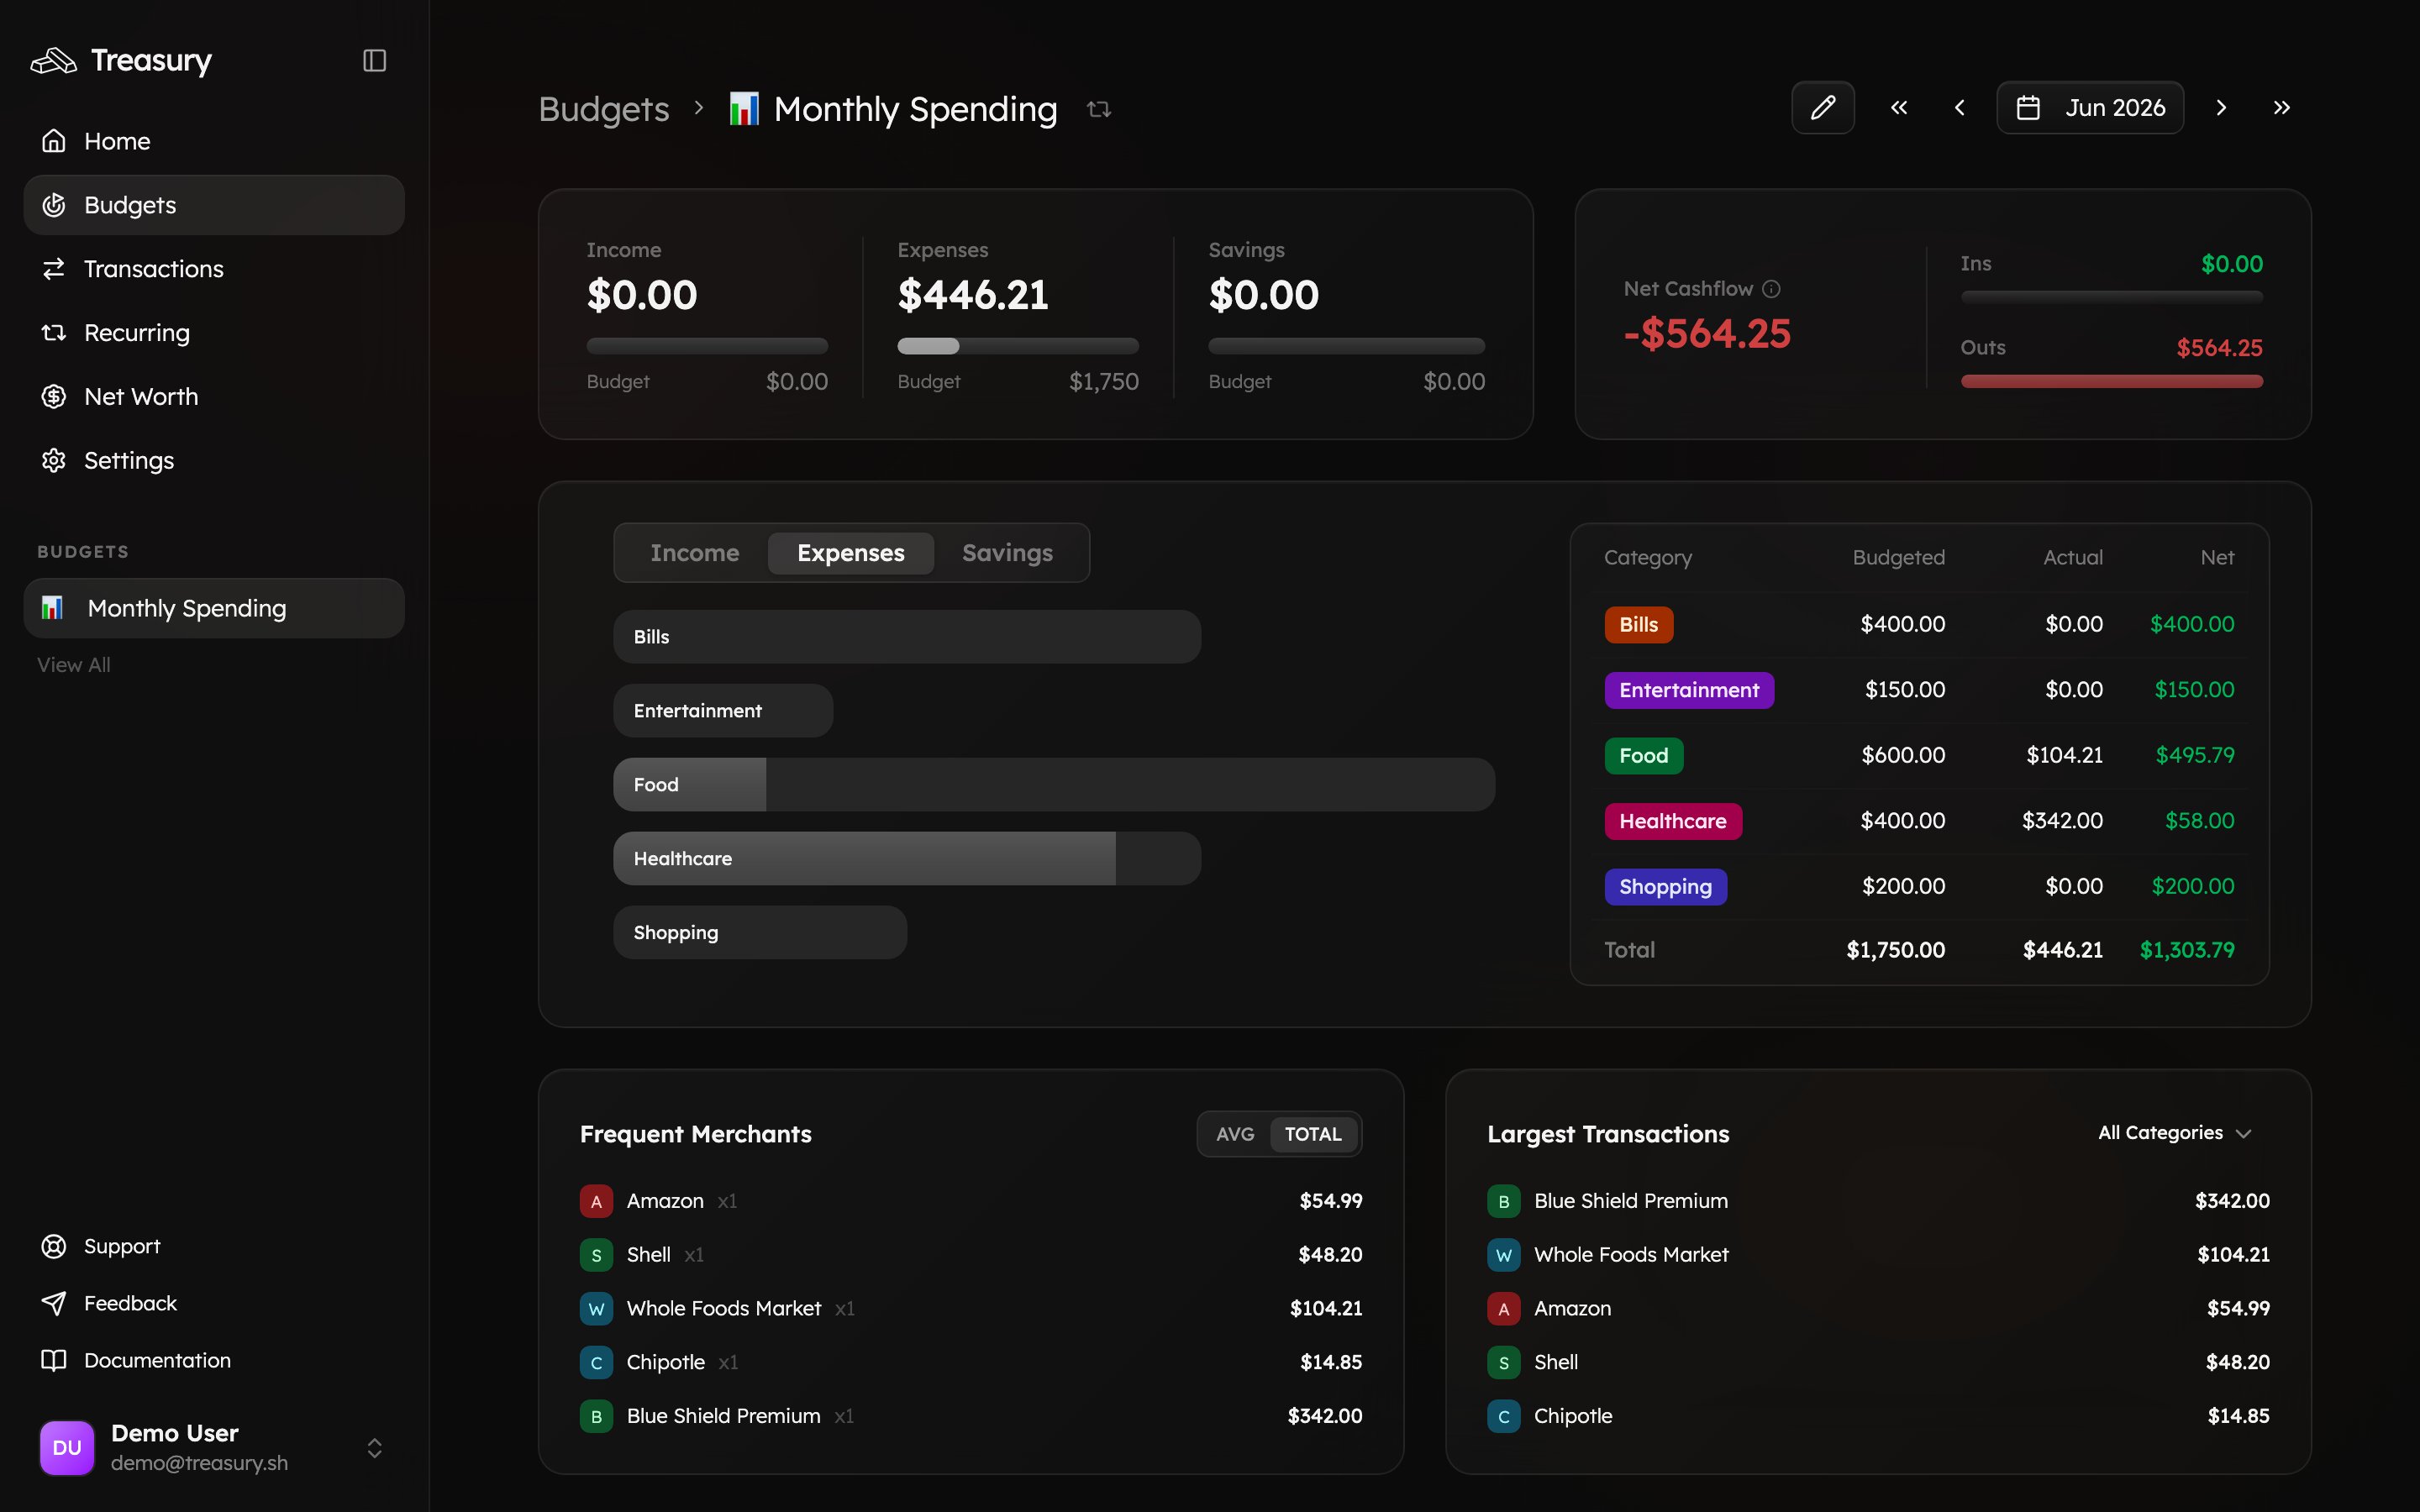
Review your budget details, categories, and allocations to make sure everything looks right. When you’re done, click Create Budget — and your new budget will appear on the main Budgets page, ready to track in real time.Track a Budget
Click any budget to open its detail view. Here you can see your Income, Expenses, and Savings against their targets, your Net Cashflow, and a per-category breakdown of Budgeted vs. Actual spending — so it’s instantly clear which categories are on track and which are running hot.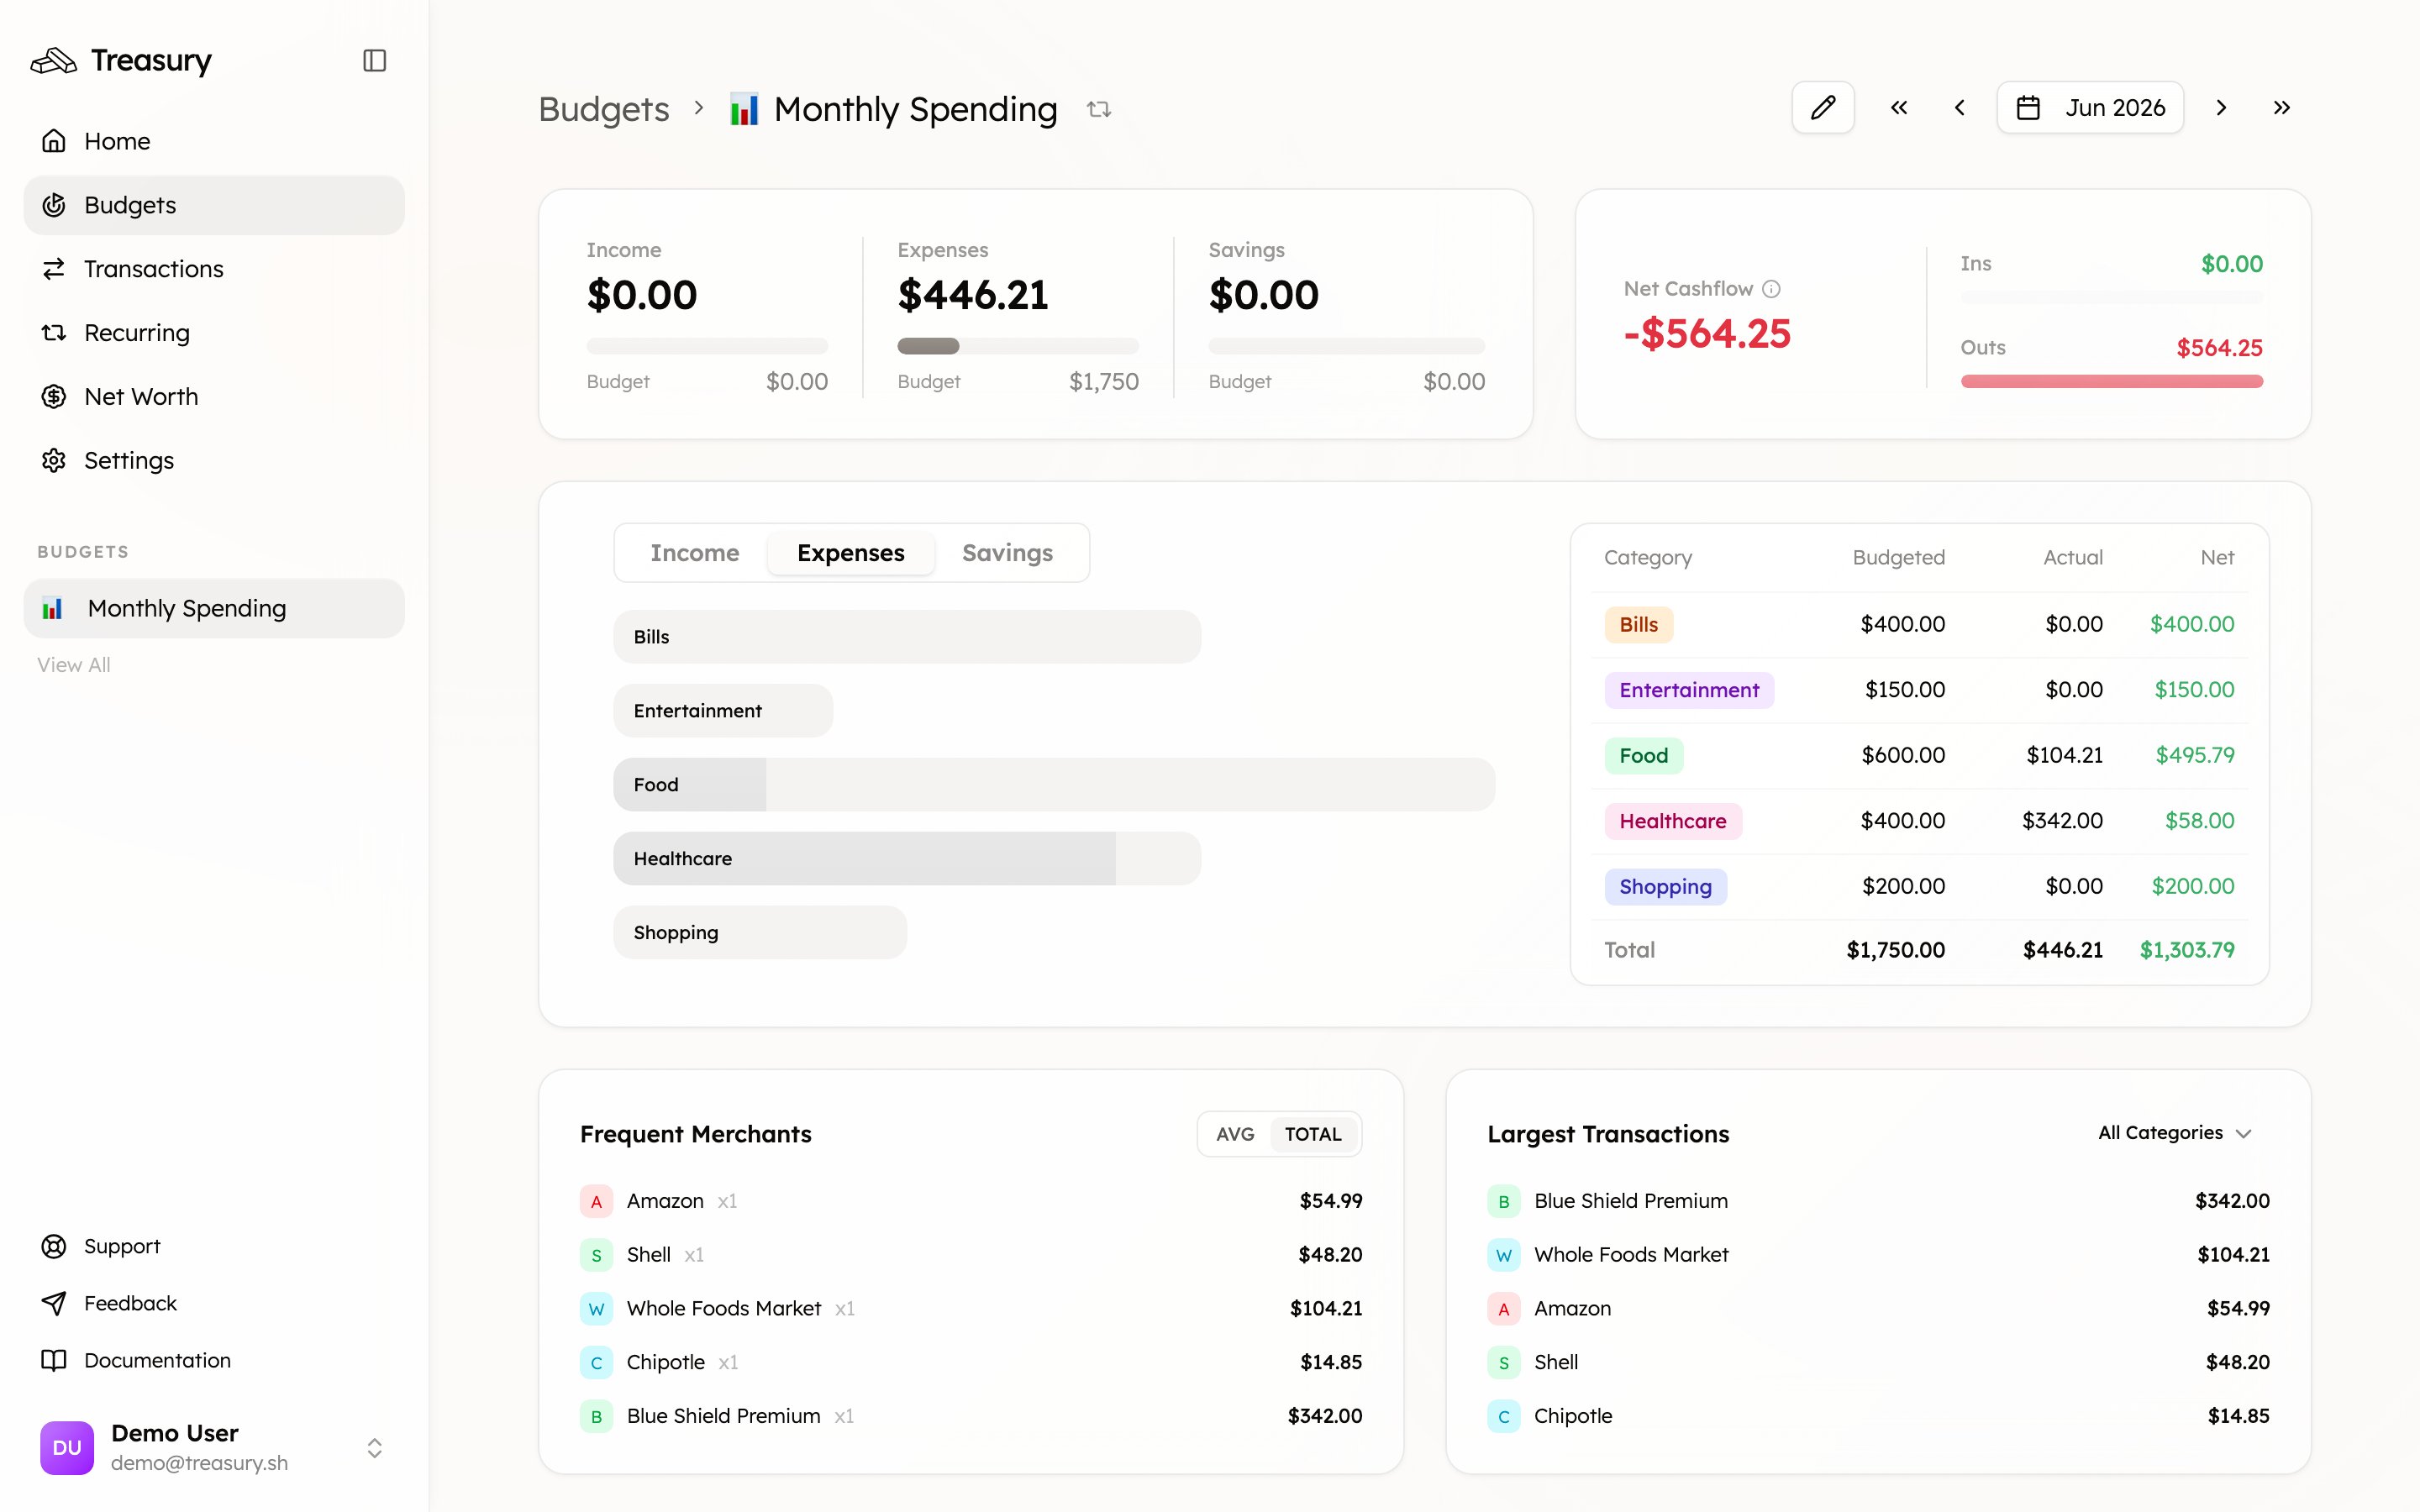
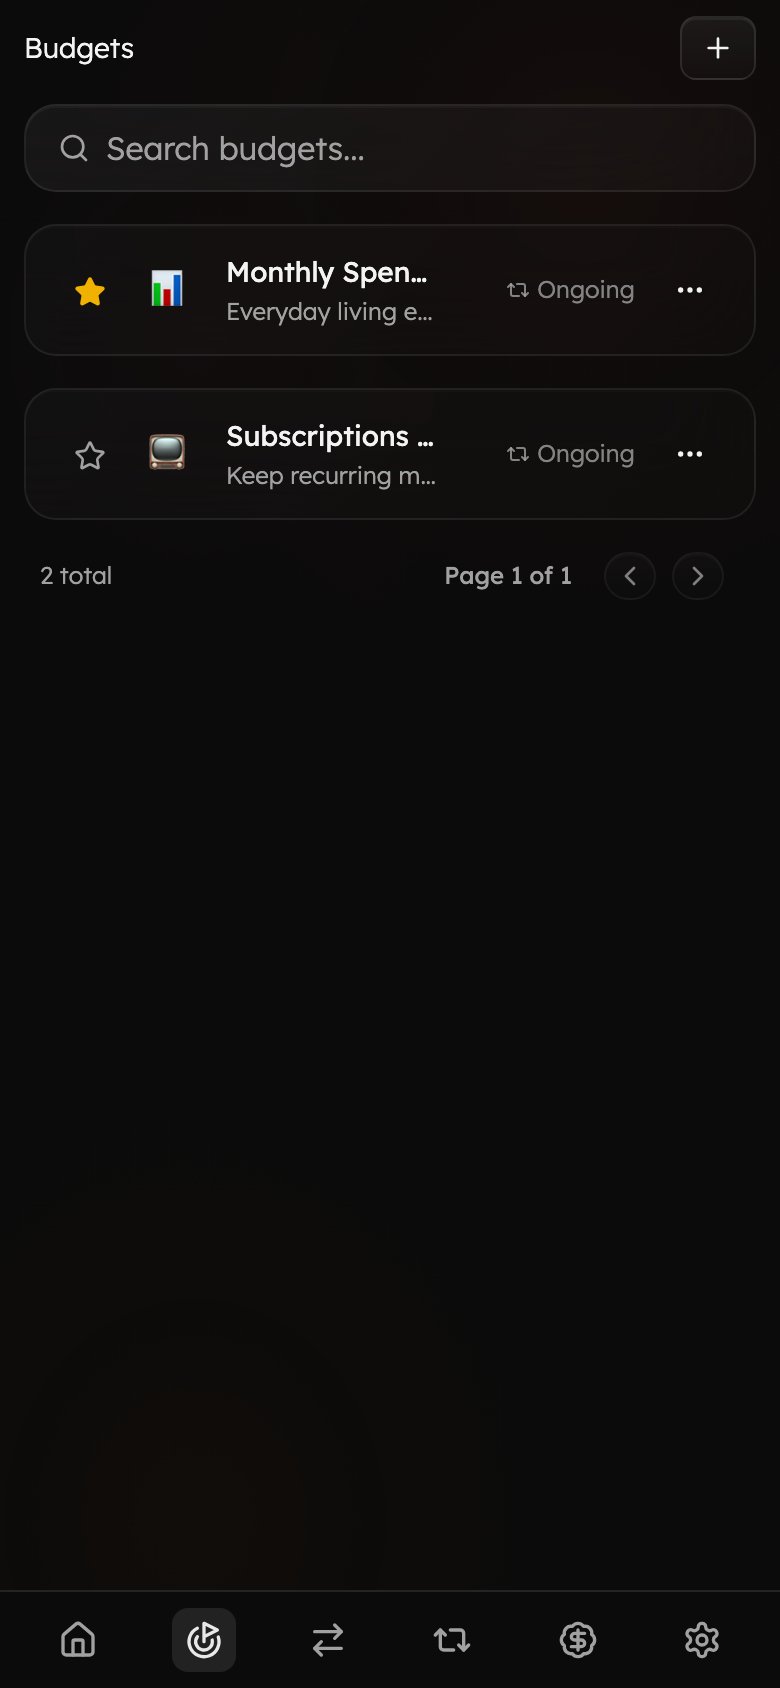
On the go
Create, review, and track your budgets from anywhere — the full budget experience is available on mobile.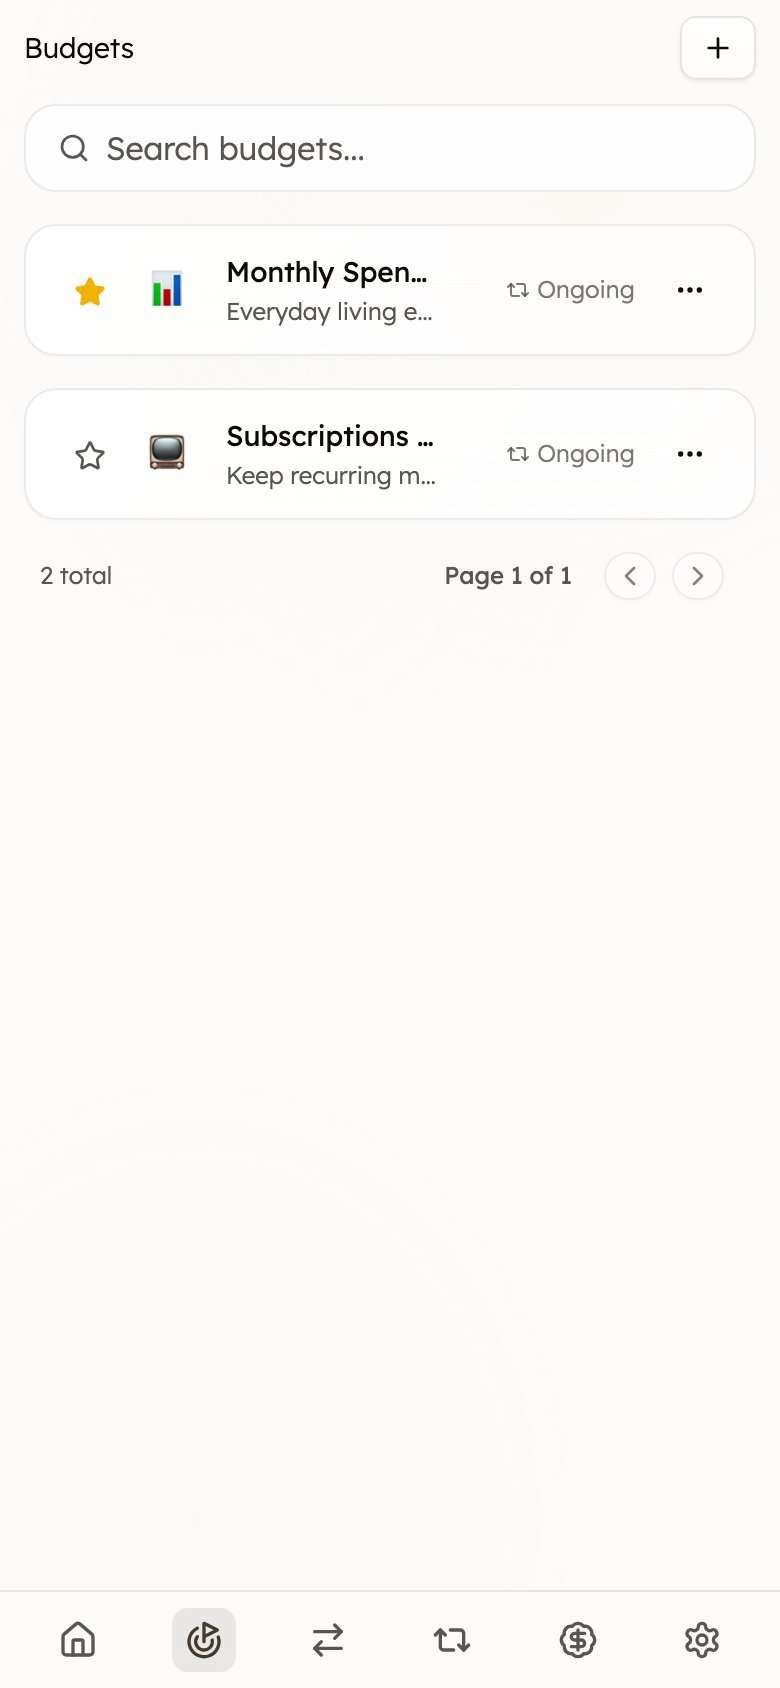
Tips & best practices
- Start with an Ongoing budget. A single “Monthly Spending” budget covering your main expense categories is the fastest way to get value — refine it later.
- Budget the categories that matter. You don’t need to budget everything. Focus on the handful of categories where overspending actually happens.
- Use Goal budgets for one-offs. Trips, weddings, and big purchases fit a Goal budget better than your everyday spending plan.
- Keep transactions categorized. A budget is only as accurate as the transactions behind it — pair budgets with consistent categorization and Turbo Review.
FAQ
What's the difference between an ongoing and a goal budget?
What's the difference between an ongoing and a goal budget?
An ongoing budget tracks recurring spending that resets on a schedule (your monthly groceries). A goal budget targets a one-off amount for a trip, event, or purchase. Pick ongoing for day-to-day, goal for projects.
Do I need to budget every category?
Do I need to budget every category?
No. Budget the handful of categories where overspending actually happens. A focused budget is easier to keep than one that tries to track everything.
Why does my budget show no spending?
Why does my budget show no spending?
Budgets are built from categorized transactions. If a category’s transactions aren’t categorized yet, they won’t count — clear them with Turbo Review and the budget fills in.
Can a budget track just one trip or project?
Can a budget track just one trip or project?
Yes — apply a tag to the relevant transactions and scope the budget to that tag, so only tagged spending counts.
Related
Categories
The building blocks every budget is made from.
Transactions
The activity that fills your budgets in real time.
Tags
Scope a budget to a trip or project with tags.
Net Worth
See budgets in the context of your whole financial picture.